Probably the most relevant section to this webpage is also the one Iĺve been dreading to write the most: The one about the motor.
Now, before I start this horror story, please understand something. This is the abridged version. There is nothing mentioned in here about the problems Iĺve had with a local powdercoaterĺs ideas of punctual that probably held the carĺs completion up for at least an entire year. Thereĺs no mention of dead time spent finding information, nor the countless hours spent looking for the parts that made it work and all the little bits of fabrication, rigging and other such nonsense that had to be done to get it to work. You wonĺt hear about painting the engine bay, removing all of the emissions control or the way the wiring harness got routedůor how many times things got done twice because of my stupidity, oversights or hired incompetence. In short, I honestly imagine that there is $10,000 in this engine at this point, and ten years of slow, horrible, grinding progress that nearly caused the car to be sold twice.
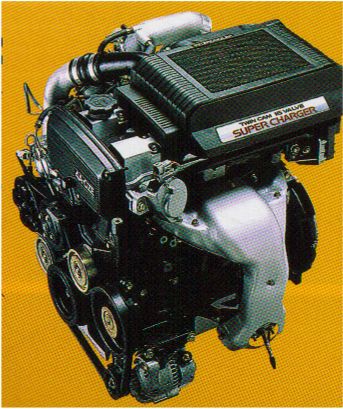
Dubbed ôThe Monster Projectö, the goal started as making more power than a set of HKS cams for the price of the cams (approximately $700). This involved a wild plan hatched in a storm of innovation one day a dozen or so years ago involving a downed supercharged MR2 in California, an internet friend and a need for speed. What followed was a lesson in why you donĺt try to build a race motor on fifteen cents, put trust in others when chips are down, who your friends really are and many other important trials on the road to adulthood and velocity. In short, it seemed like a good idea at the time, and I was in over my head.
So, turn the clock back to 1995 and grab your popcorn.
As a young student at a local university, I was searching for speed parts for my friendĺs aw11 MR2 when I stumbled upon a website run by Aric Shen of a car club called Speedline Racing Concepts. Through conversations with him about hopping up an AW, it turned out that he was planning on losing his twincharged car all together and replacing it with his first love, an FC3S. It also turned out he had a million spare parts to sell, including numerous speed parts. I believe the way he put it was ôif youĺd called me an hour ago I had a custom fibreglass body for it, but I just sold itö. Either way, he had cams, a seriously ported throttlebody, an extrude-honed intake manifold and a bunch of other bits for sale. As the conversation went on, he mentioned that the real way to go was with a supercharged engine because you would gain about 30hp just from swapping that in, never mind doing tuning work to it.
Needless to say, this sent my head spinning because, as we all know, the aw11 and ae86 share the same engine. Within a week I had done my homework and discovered just how easy it was to put a 4agze into an ae86. Hard but possible. I bought the engine and shipped it home. There were no examples of this motor to be had in Canada at the time. The only shop I found that had one wanted $3000 just for the bottom end (which was ridiculous). Only recently has the market been flooded with 4agzeĺs for $1000, and theyĺre all JDM imports that are incomplete and more or less rebuild-only prospects. All in all youĺd be paying exactly what I did, so theyĺre really not the better way to go.
It arrived in about three major pieces, bottom end, top end and miscelaneous bits from in between. Living on a Kraft Dinner budget, the engine had cost me $700 with another $300 for shipping. This meant my modding was basically shot for the year. We did tear down and inspect the motor though, only to find that it had spun a bearing and scratched up the crank fairly badly.
Still, this seemed the way to go. It was essentially complete, having a chopped harness and no ecuůsomething that would come back to haunt me many times over. In my project research, I met a man named Robert Reid through Stephen Gunter, who claimed that not only could a 4agze run well off an ae86 ecu system or aw11 ecu system, but that it would in fact be faster than an OEM 4agze mr2! So, it was decided that this was the way to go.
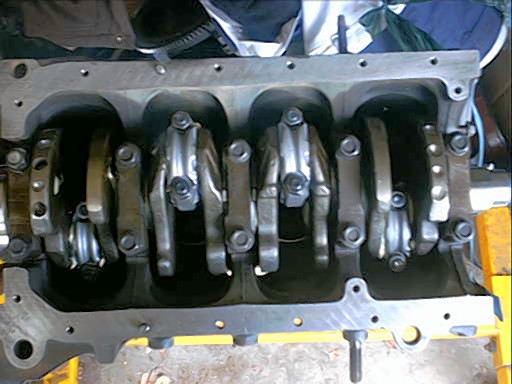
Once more money was saved, the motor was sent out to be machined and cleaned in preparation for reassembly and ass kicking. I took it to a local shop who specialized in top fuel funny car engines. There, the motor was cleaned and hot tanked to clean out the years of neglect and muck caked in its orifices. The parts were then magnafluxed, which is a process where main components like heads, blocks and cranks are sprayed with a dye and then washed. The dye remains in cracks and crevices in parts (cracks that shouldnĺt be there)
and it all shows up under ultraviolet light to warn you in advance of assembly that somethingĺs wrong. Because it was a Toyota motor, nothing was out of spec except for the spun crank. The blockĺs cylinders were honed for ring seating and straightness, the main journals were honed for straightness and the block and head were decked to ensure flatness for a good seal. The whole assembly was then balanced to perfection. That cost another $700 or so dollars and sank any further progress for another year.
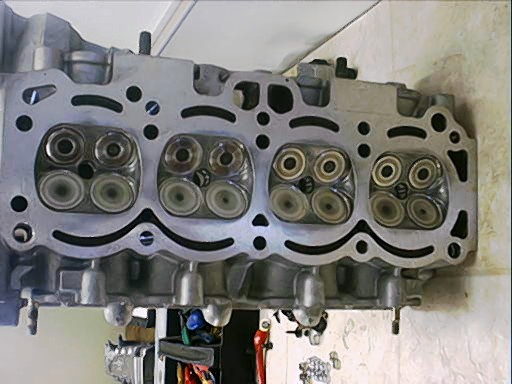
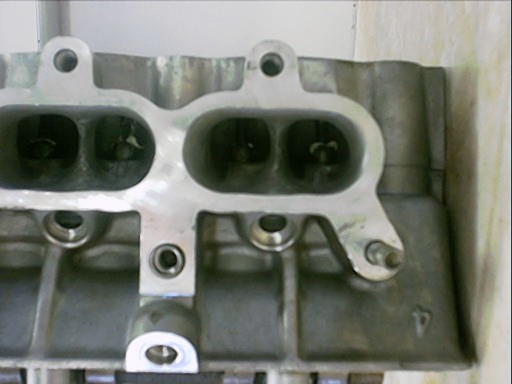
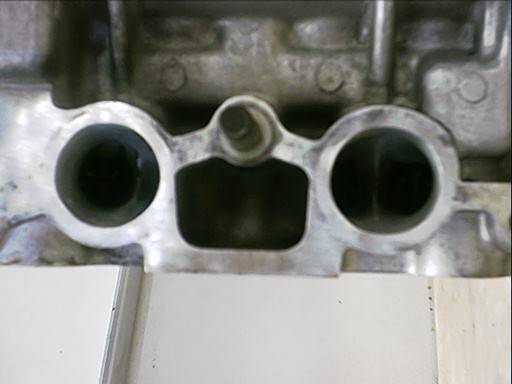
During that winter, I sent the head out to get done. A different local shop that ôspecializedö in 4ag work agreed to rebuild the entire cylinder head for $700 (thereĺs that number again!?). This meant a complete reassembly of the head with new guides and seals and a few tricks. First off, the head was ported for better flow and polished on the exhaust side for the same reason. Now, porting isnĺt terribly important on a forced induction engine, but it is good to help efficiency. I mean, if you have a pump forcing air through a straw, thatĺs already better than sucking it through the same straw, right? Still, it seemed better to do it right and do it once, so everything was gone through in the search for volumetric efficiency.
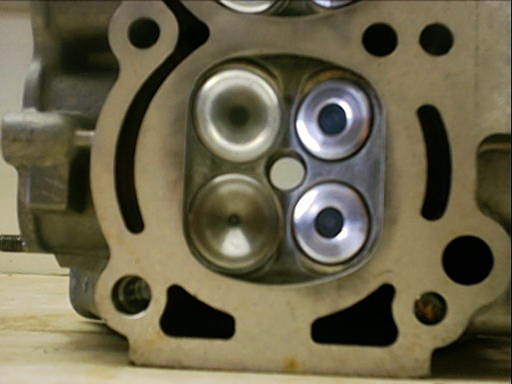
In keeping with that theme, larger valves out of an MR2 sw20 Turbo 3sgte head were installed for even more flow. Finally everything was specĺd and adjusted to perfection. OEM ae86 cams were used from the original 4age out of the car. 4agze cams and the later small port cams are actually quite small in lift and low in duration compared to the early cams, so it only made sense to go with the early model parts.
My next few paycheques went into gaskets, bearings, rings and other assorted engine nonsense, as well as a TRD 0.8mm steel headgasket. All of that cost, you guessed it, $700. The gasket kit was purchased from Victor Heinz, which is a company that makes gaskets for most regular cars. They also make them for top fuel motors, which is the line of gaskets I used for mine. Strangely enough, they were more comprehensive than Toyotaĺs kits for significantly less money and of similar materials. Toyota has since changed many of the gaskets for the 4ag, so now Iĺd go with OEM beyond a doubt, but at the time Victor was the way. Bearings are Clevitte 77. Many people would say ôwhy not OEM here?ö and theyĺd be right.
To me though, when Clevitteĺs ô77ö series bearings are used in every high performance car on earth up to top fuel (again with the top fuel), thatĺs what I need in my car. I honestly donĺt remember what brand of rings I bought, but theyĺre not Toyota either and were from a large, American drag racing company. Fel Pro perhaps? Either way they were high quality carbon steel or something and Iĺve had no issues.
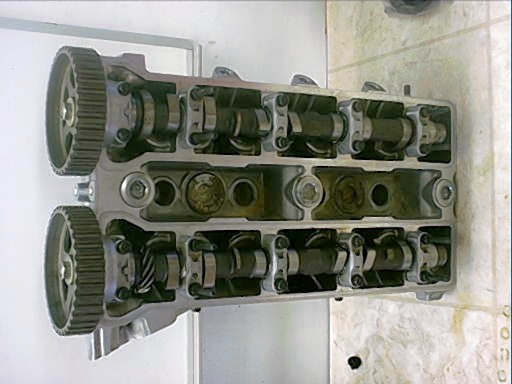
At this point it was time to assemble the motor. This is where a friend and I spend many days hiding in a garage specĺing parts and measuring tolerances to ensure that everything was blue printed. I still remember my hands swelling and turning colours from all the solvent and methyl hydrate used to clean parts for days on end. We managed to get everything to their appropriate minimums and assembled the motor. Well, we got the bottom end together and then the rest of the project hit a snag.
It seemed that my original plan to run the 4agze off the OEM ae86 ecu wasnĺt possible. Progress halted as I hunted information. Another snag got hit when I discovered that I had no alternator bracket. The 4agze supercharger sits externally like an alternator or powersteering pump inůyou guessed itůthe OEM ae86 alternator location. Nobody wanted to make a bracket, so I just wound up driving the car on its poor, tired 3xx,xxxkm motor while I searched for a solution. Unfortunately, the solution never came and time passed by with a total lack of action.
It wasnĺt until I went to California many years later that a ray of hope shone upon the project. Through the grace of God (and Moto from Club4ag) I met a man named Mike Urbano who claimed to have wired so many 4agzes into cars that he could put mine into my car on his lunch break. All I had to do was send him the parts and he would make it happen. Mike also assured me that the OEM ae86 ecu would never run a 4agze. Actually, he said it couldnĺt. Taking the word of the master, I followed his idealology and prepared to send him a care package. I watched him wire a 3tgte into a Mango over a lunch hour, so I knew he was good and took his word as bondůit couldnĺt be done.
During this, I completed the assembly of the engine in a friendĺs shop. Gary came over there and the whole thing went together in a week or two of day-here day-there work of cleaning parts, specĺing things and using spanners and torque wrenches. Unfortunately, this really seemed to drive a wedge between myself and the shopĺs owner, who was the one that had insisted I assemble the engine in the shop in the first place.
I never did get clarification as to what this was all about. After being kicked out of the shop for no apparent reason, the engine spent the next winter in my garage. I finished the installation of the accessories in the spring and that summer we put the low-comp 4agze motor into the ae86, running naturally aspirated for break in.
I continued to collect parts for Mikeĺs end of the swap, but things were hard to find. Living in a Canadian city that has no real modding scene to speak of (but one hell of a ricer scene!), parts were scarce. The Canadian dollar was at an all time low, so buying them from overseas or the USA really hurt. One of the ecuĺs I collected for this project came from a local tuning shop. They claimed that it had had its rev limiter removedůand after spending $300 it turned out that there were in fact parts of the circuit board that had been, well, f*&%$d with. This rendered the ecu useless because nobody knew exactly what it was going to do.
I didnĺt find another one for an entire year of searching until a friend in the USA went to a standalone engine system and no longer needed his. Coupling that to the electrics that I got off an ae92 4agze (DLI and all) and I was in good shape. I sent everything to Mike and waited, knowing I was in the best of hands.
And then Mike died.
I had talked to him repeatedly over the nine months he had taken to do what he assured me was two weeks of work, and everything was ready to come back. I re-emailed him my address and waited. And waited. And waited. I started calling his cell and got no answer. I tried his house. No answer. Life took over and I dropped the whole thing figuring Mike was just busy until one of my friends pointed out that there was a memorial thread running on Club4ag.com and SupraForums.com.
It seemed that Mike had come back from Florida (where he was the last time I talked to him) and was on his way to a barbeque a few short blocks from his house on his motorcycle when a Suburban ran the redlight he was atůat 60 or so miles an hourůthrough him. Needless to say he was killed instantly.
My project died with him. Mike had been sent every concievable part he might have needed, leaving me with nothing to recover with. I was looking at having to buy another entire 4agze just to rape the electronics from it, which I just didnĺt have the money or drive for. I had already ripped my hair out for ten years at this point and I just about gave up. There was still one ace in the holeůMike and I had a bunch of mutual friends. Knowing that everything was done I hoped that it was just sitting on a shelf and that someone else could rescue it and send it to me. I started running into walls with my friends at this point. It seems that there was a clash of cultures here because in Canada getting something returned from an estate would never have been a problem given the circumstances. Apparently though, in California this is considered to be in extremely poor taste. I guess there is actually a law that says that the debts of a person end with their life, and that nobody can be forced or expected to fulfill those debts for them after the fact.
That all makes sense to meůIĺd hate to have my family persecuted for my car paymentsůbut what never made sense to me was the inability of someone to drop by a house, pick kup a box and and mail it to meůespecially given how important this was to me. It was that simple in my mind, and still is. When you put it that way to a Californian, they stop talking to you because youĺre the devilůwhich I must be because this whole sillyness cost me my engine and all my Californian friends.
Suffice to say, those bridges are still smoldering. Hell, theyĺre flat out burned now because once I figured out that this was going nowhere, I made sure to tell each and every one of them just how I felt.
At this point I was screwedůso what did I do? I decided that instead of lying down and accepting the death of my project, I was going to fight. It had been at the breaking point on several occasions, and had always managed to pull through. I sent some emails.
I talked to some people who I knew had put 4agzeĺs into ae86ĺs using OEM electronics from back in the day and I made it happen. In short, I decided I was better off blowing up the 4agze and actually trying to do ôthe impossibleö than sitting on my ass thinking about it for years like I already had been. Time to put up or shut up and do what Iĺd said I was going to do all alongůput a 4agze into an ae86 on the OEM ecu and electronics.
But it was impossible. It couldnĺt be done. Just ask anyone. Never happen.
But it did. It happened.
Andůit worked.
It worked well.
So well.
Theyĺll tell you it canĺt be done, that it wonĺt fit, that the ecu wonĺt understand, that the car will overheat, that everything has to be reinvented. Bluntly, theyĺre full of shit. The results speak for themselves. Given just 4 pounds of boost on the OEM ecu using the 4agze from an mr2, an ae86 becomes a bullet.
But that is only the beginning of the end. Read on, because Iĺm going to tell you how to do it, step by step.
For starters, make sure that youĺre using a 4agze motor that is freshly rebuilt if you want it to last. Installing supercharger components on used engines causes things to wear exponentially.
Youĺll be looking at a total loss, and a lot faster than you think. If youĺre planning on bolting gze components to your regular 4age, slap yourself. The compression difference alone makes it dangerous unless you really know your stuffůand putting it on a used 4age that is tired is essentially motor-suicide. So many people have tried that and failed that I can honestly say youĺd be an idiot to try.
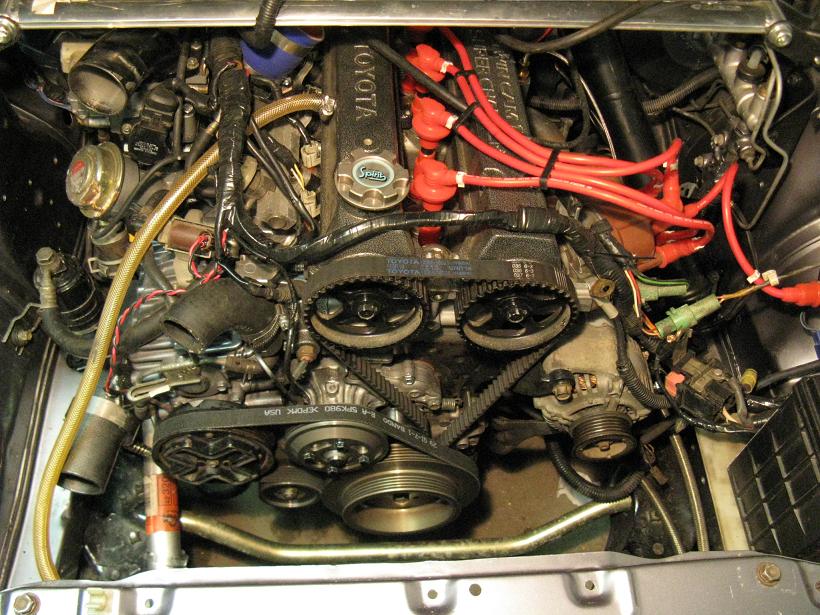
The first and most important this is thisůset the motor up as a 4ag. Put on the OEM intake manifold, fuel rail, injectors, alternator etc. and get it in the car and running like an OEM motor for now. This will be easier in the long run. Also, make sure you have some kind of EGT or wideband O2 sensor (I have both, actually) so that you can tell exactly what the motor is doing. The #1 cylinder is the most likely to lean out due to the long air path and changes in direction, and #3 is likely the richest for the opposite reasons.
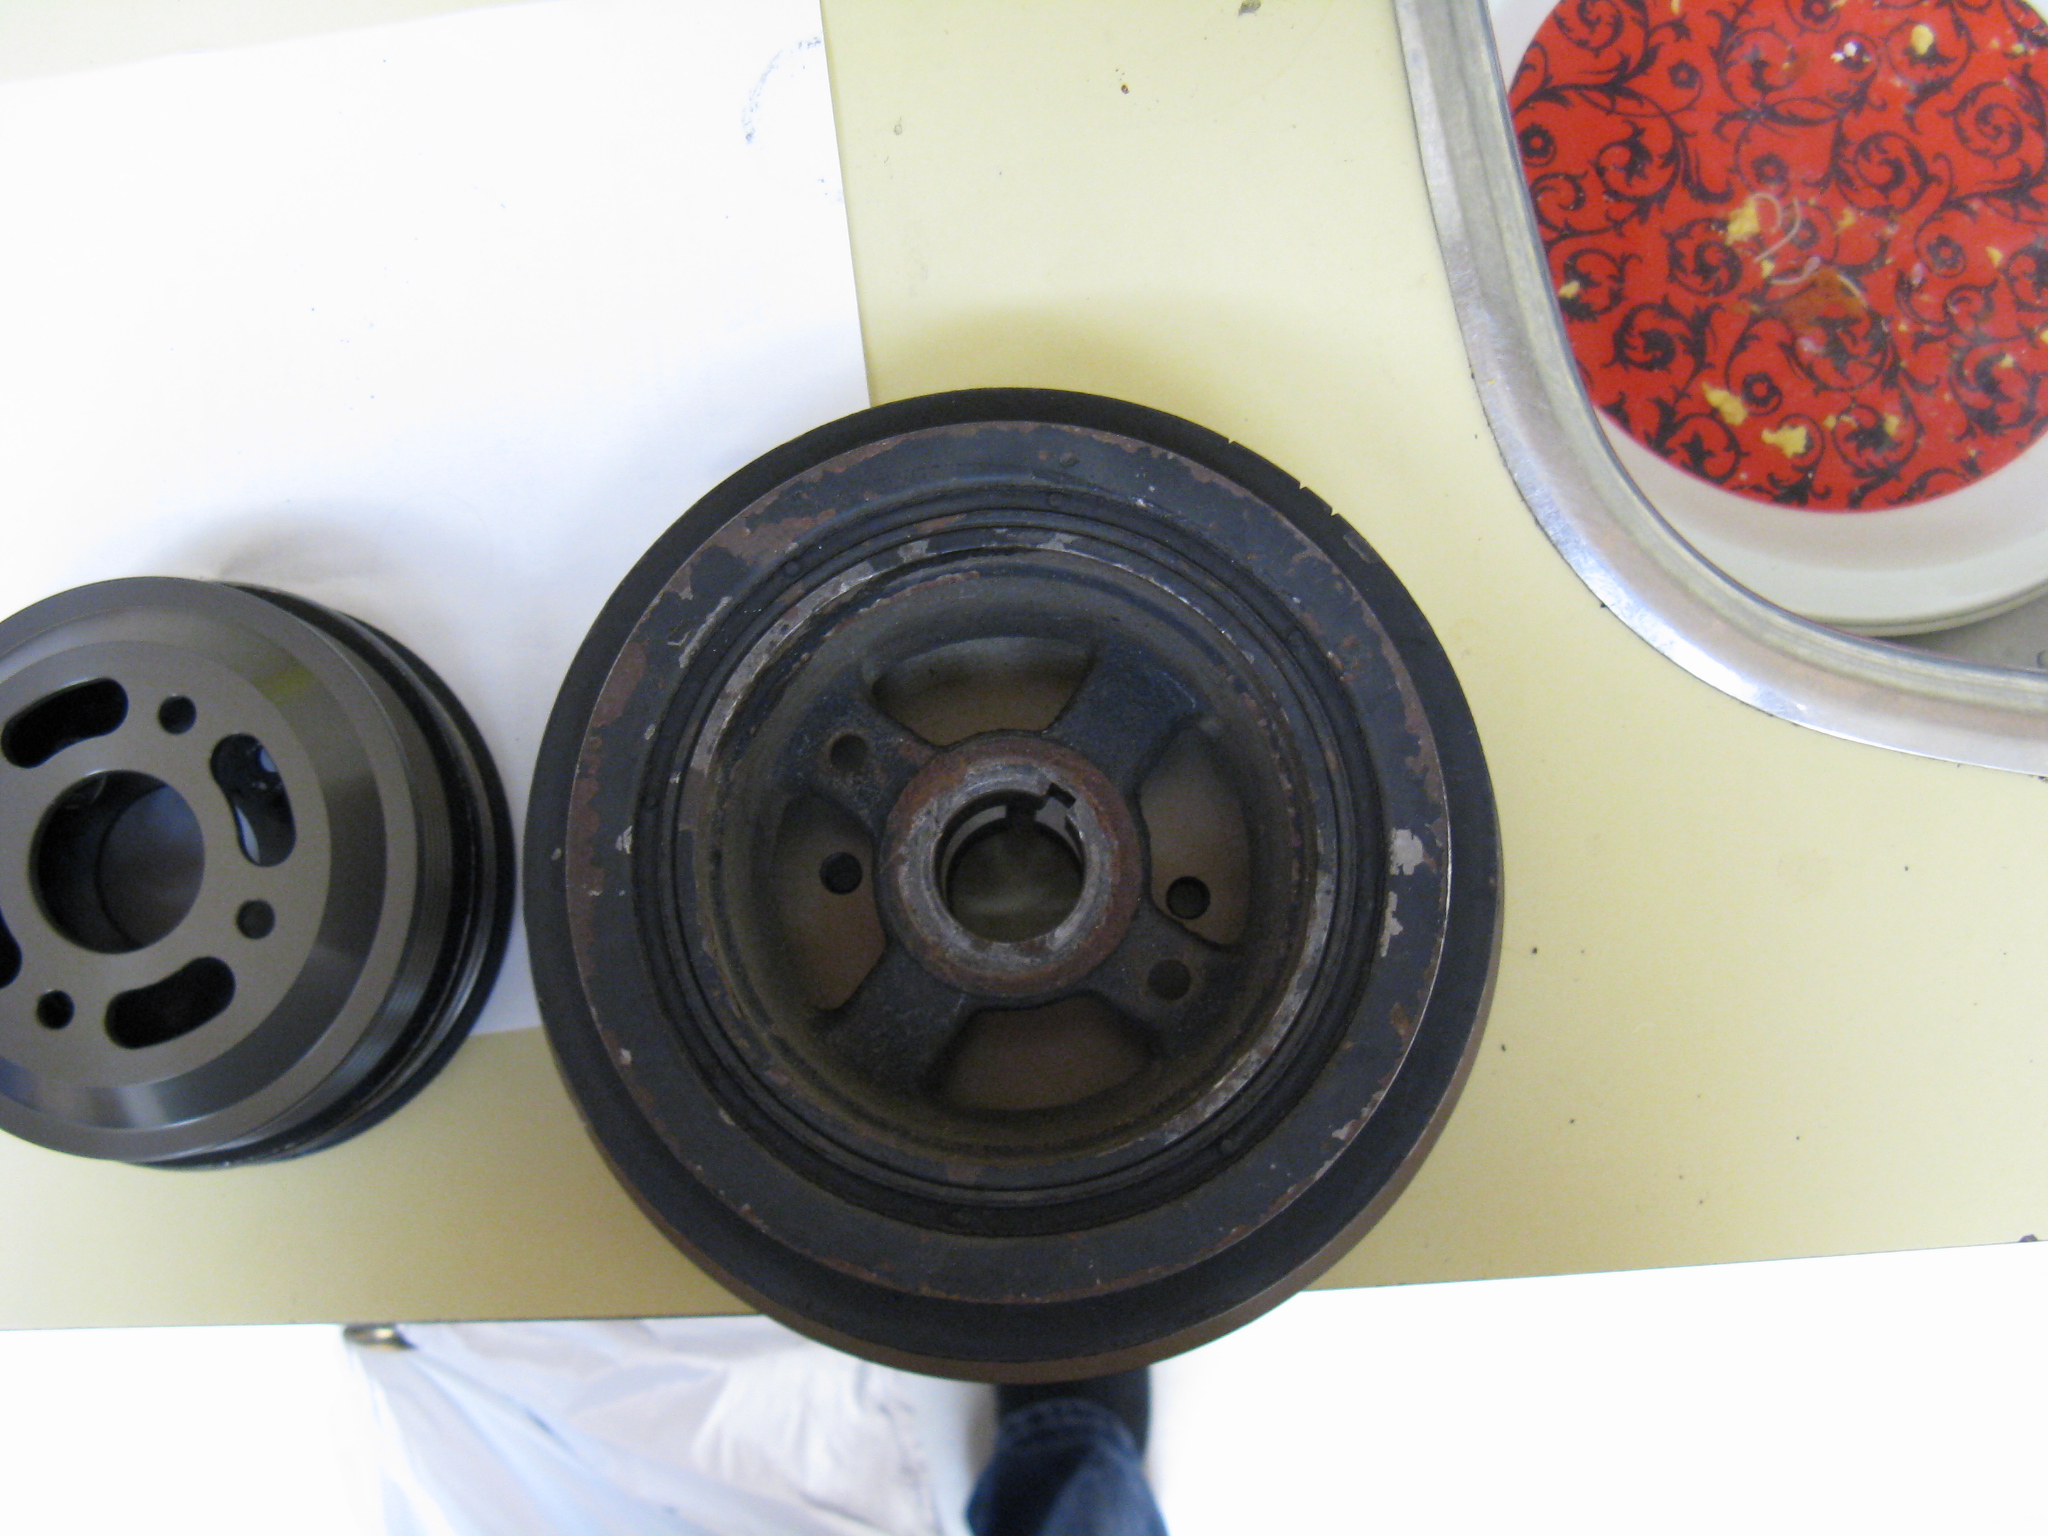
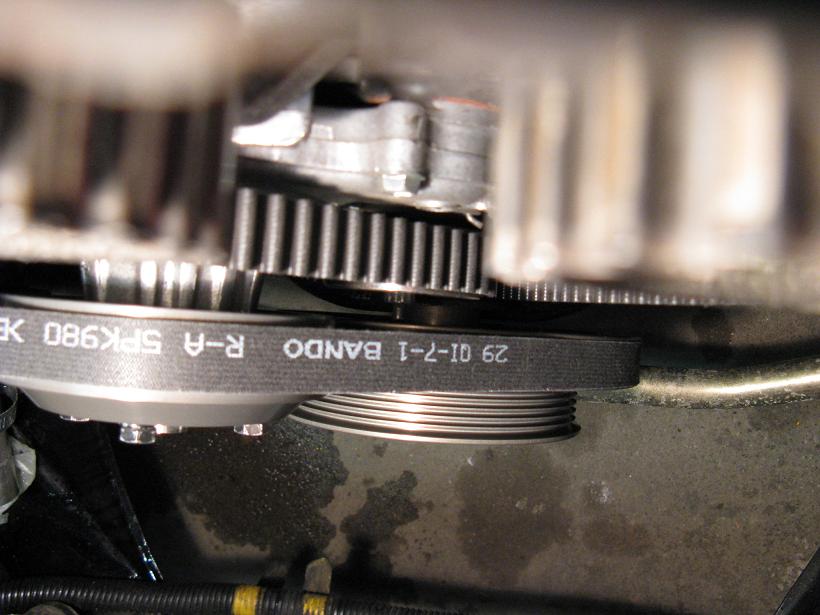
Monitoring progress is always better than guessing. Otherwise youĺll have to check your spark plug colour to know whatĺs going on, and that can be too late in most cases were the carĺs too lean. Ensure that youĺre using the 4age crank pulley and all externals.
Once that is handled, the motor is burned in and everything looks good, install the 4agze fuel injectors. These injectors are twice the size of the OEM ae86 injectors (365cc vs. 182cc), and to be honest the car will run like a black smoke factory from industrial England circa 1880ad and youĺll soon destroy the engine if we donĺt trick the car into reversing that. Also, make sure the car is still running on the ae86 crankshaft pulley. This will keep all the OEM systems happy and keep the the boost low for tuning when you do finally put the blower on. If you donĺt have injector plugs to connect into the wiring harness, you can get them off a 1986-92 naturally aspirated Supra Mk III.
Once youĺve installed the injectors, remove the lid from your airflow meter. This is the black plastic square on the top of the meter. The airflow meter measures the air coming into the engine and turns that into a signal for the ecu to understand. Weĺre going to mess with that understanding by moving the needle on the circuit board, which changes the ratio of air inhaled to fuel injected. Donĺt forget to score the wheel in the original starting position before you move it! Start by knocking the AFM back about 4 clicks clockwise. This will still run rich but it gives a good starting point. Realistically, you want to keep going clockwise until the car runs as close to normal as possible. This might seem counter intuitive at first because weĺre going to be ramming air into the motor in a few momentsůbut trust me on this. The motor sees no boost at idle, and as the boost picks up in a linear fashion, so will the fuel through the air flow meterĺs movement.
Your injectors are already huge, so thatĺs covered. Once danger is turning the wheel too far, at which point the fuel pump cut-off relay in the dash will start clicking. Donĺt get it that far.
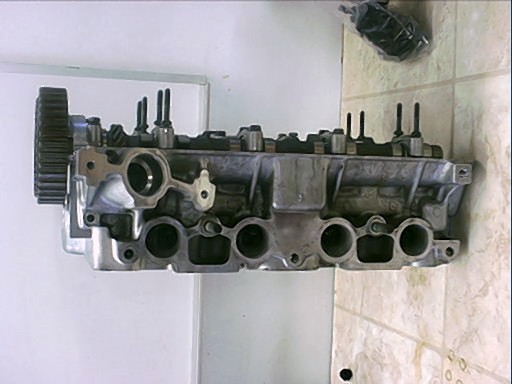
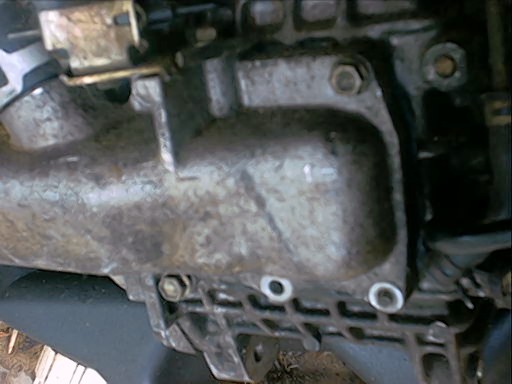
Once this is done and the carĺs running well enough, you want to turn it into a 4agze. Attach the 4agze intake manifold. Youĺre going to have to work a bit on the water system to make it all work. Re-use the 4gze upper water neck and the 4agze water pump. The upper water neck will cause you problems because it has a heater-core pipe that is brutally long and dangerously flimsy.
Cut this pipe short and run the heater to it via hose, or just cut it short and plug it while running without a heater core. Cut the outlet pipe on the pump and attach a U-bend from an exhaust shop to it. This will divert water rearward towards the firewall and then bend it around the supercharger (which is in the way of the OEM ae86 system) and then run it forward again to the radiator. I managed to find a 1.5ö J-pipe made by Dynomax that was a perfect fit the first time. Use bits of radiator hose to connect this tube to the OEM lower 4agze water pump pipe that youĺve trimmed to length and to the radiator. Now you can install the blower and attach the belt. . Youĺre going to have to cut the corner off the 4agze supercharger bracket because it interferes with the ae86 engine mount. Install the bracket, the blower tensioner, intake piping, throttle body and upper intake tube. Plug all the holes with vaccuum caps and JB weld. They donĺt do anything anyway. The only vaccuum line youĺre going to need is the one that runs off the brake booster, and the connection for that is pretty obvious on the intake piping. There is another on the intake manifold between the blower and intake piping that youĺll need tooůthe rest are not used.
Mount the 4agze throttle cable mount backwards in the OEM 4agze location and re-use the ae86 throttle cable. It will be a little too long for the application, but it works like a dream. Youĺre going to have to ômassageö the cable mount with a pair of pliers to get it to line the cable up to the trottle body properly, but once youĺre done with that minor tweak I think youĺll agree that it looks like it was meant to go there.
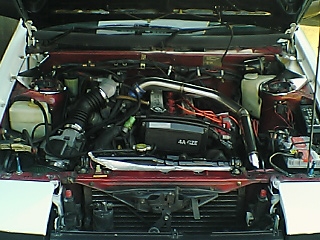
For initial tuning, I ran the car with no alternator, right off the battery because I had no alternator bracket. I used the blower pipes off an ae92 4agze because they top mount the intercooler. This allowed for less expensive piping to be used in the initial test runs, and re-use of many OEM parts (like the intercooler) to test-run the unholy creation youĺve just finished. Youĺll have to leave the hood off for the initial drive, but I doubt youĺll mind once you hear the car. I sourced some cheap, generic Goodyear radiator hoses to use as piping joints. It worked okay, but only for short term. The 4agze dumps so much fuel that the fifth injector in the intake pipe actually caused one of the radiator hose joints to visibly deteriorate from the inside out within a few kilometers! Be careful and only use this for short testing. Replace these joints with silicone hose as soon as youĺve got a permanent intercooler setup planned.
The only other thing you have to do is wire up an on-off switch to the blower and the vaccuum flow switch. Both of these are really important and youĺre going to need them. They both go on and off at the same time, so only one switch is needed. I had mine loosely wired in under the hood using a simple on-off toggle switch at first for testing purposes. Since then, the switch has actually been replaced by the OEM defroster switch inside the car. I have no defroster, the switch was there and even has a light to indicate on or off for easy visual reference. Plus, its completely stealth and canĺt be switched on or off by accident. The car can still drive without the blower as well, so should something go wrong you can still get homeůjust flick the switch. Importantly, you can wire the blower to run all the time with your ignition, but then youĺll lose the control of turning it off during your initial tuning sessions. Best to hard wire it later.
Lastly, and most overlooked is the fuel system. UPGRADE YOUR PUMP. Mk III Supra/Mazda RX-7 FC3s Turbo fuel pumps are cheap enough, available in just about every parts store and drop into the tank in the OEM position using all original hardware. In short, its identical in every way except that it has far more flow. Installation is easy tooůjust drop your tank by undoing the bolts at the front of it to loosen tension on the straps and lower it down using a floorjack and a small sheet of wood. Once the tank is down, undo the pump carrier, change the pump and replace the tank. Make sure you remove all of the plastic and seals around the filler neck inside the gas door before you drop it. It only takes about two hours for a total novice with no manuals and basic mechanical knowledge.
Weĺre talking about something like 5 bolts and a dozen screws. You may want to replace the hoses while youĺre down thereůbut be careful about removing the tank entirely. The delivery lines are notorious for seizing at the joint above the axle, so when you go to undo it the line will twist and youĺll have to cut it off and make a new one or replace it with hoseůeither way itĺs a real chore.
Thatĺs it. Simple enough for you? All you have to do now is drive it around and fine tune it using the AFM and timing to get it right. Go slowly and do it properly and systematically. At this point youĺre only hitting about 4psi because the ae86 pulley on the crank is quiite a bit smaller than the one off an MR2. Iĺd recommend tuning this, leaving it a little rich. Having fun is more important than trying to blow things upůlets get it running right first.
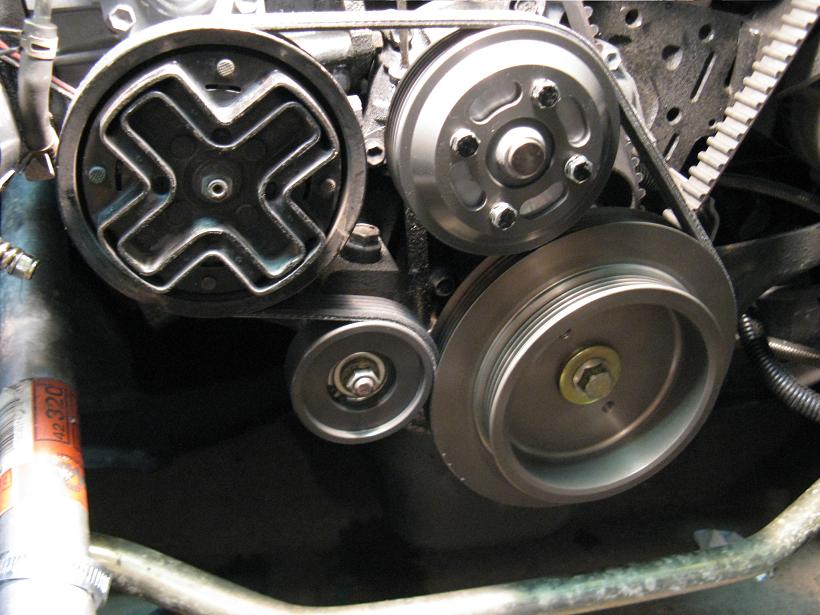
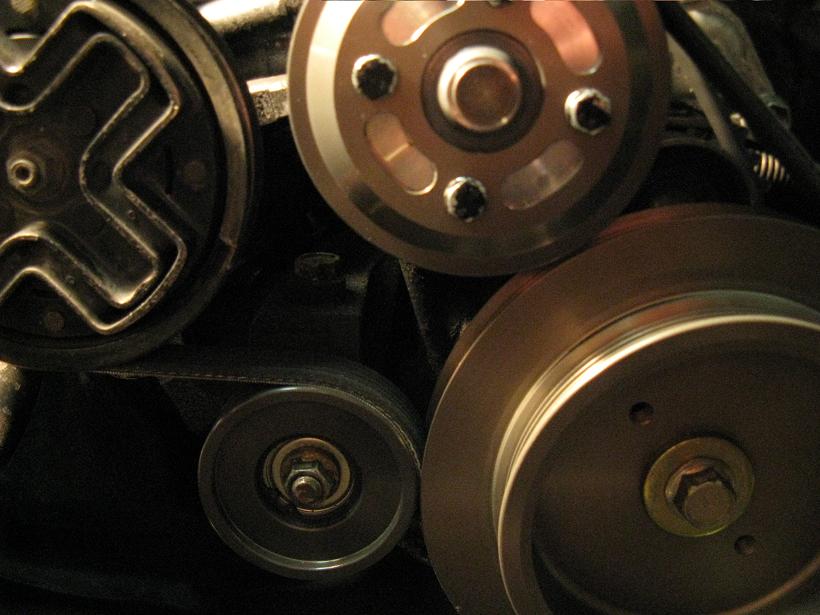
Thereĺs still a few issues to conquer. For starters, you still donĺt have an alternator! Simple. Go to a junkyard and find an ae82. Itĺs a four door corolla sold at the same time as the ae86, with a 4ac engine. This car features the perfect alternator bracket for our application. Unbolt the ae82 OEM alternator and throw it away. Undo the five bolts that hold both the upper and lower brackets and take them home. Once you are home, youĺll have to do a bit of creative grinding. Cut out a section in between the two lower bolts on the upper bracket to allow clearance for the oil pressure sender. Also, slot the holes to the right on both brackets. This will allow you to pull each bracket forward on the motor so that you can run the alternator off the front pulley of the crankshaft. I have no powersteering, so this works well for my application. I managed to get it all to work with minimal adjustment and a Goodyear 4050315 belt. It fits like it was meant to go there too. The only thing that has to be done is to move the alternator electrical connections from the passenger side to the driverĺs side. This is easy, seeing as all the original alternator wiring runs from the passenger side under the radiator back to the fuse boxůall of which goes within six inches of the new mounting location. I took the liberty of having a friend of mine extend the holes on the bracket by adding in a little welding stick for safetyĺs sake, but in all honesty it wasnĺt necessary. The OEM ae86 alternator literally drops right into place. If youĺre careful everything will line up flat and straight for minimal belt wear as well. The front pulley isnĺt as big as it should be, so voltage will be down from normal, but once you start upgrading pulleys it gets bigger and bigger so the voltage winds up where it needs to be in the long run. The OEM crank pulley from the ae92 4agze has a front pulley that is exactly the same size as the OEM ae86 crank pulleyĺs rear pulley that the alternator ran off of in the original confiuration, so it should work reasonably well. I really only run the motor and my lights, so my electricity is minimal anyway.
Make sure you think about this before you dive in.
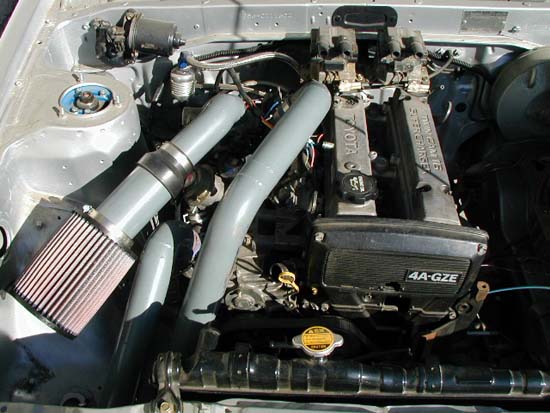
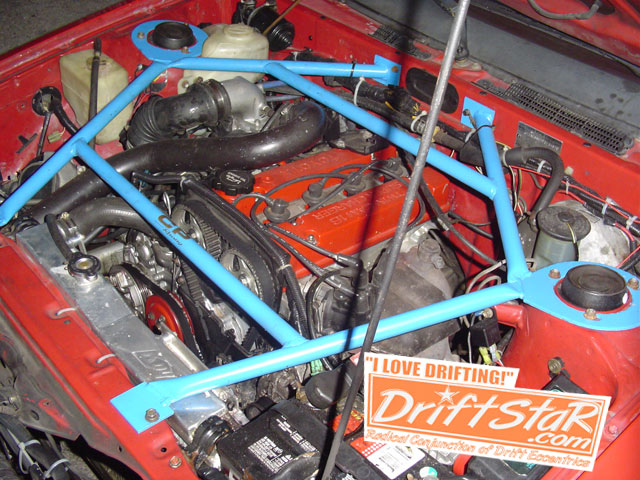
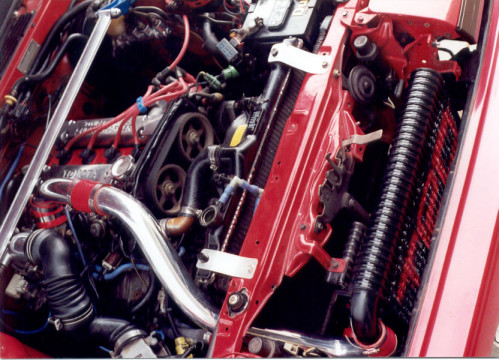
Secondly, you canĺt run a strut tower bar. It hits part of the 4agze intake tract where the AFM connects to the supercharger and throttlebody. Being out by at least half an inch, this can be a major problem. So, I had a friend of mine fabricate a new intake pipe out of some sheet steel and a piece of exhaust piping. Not only did this increase the clearance necessary to clear the bar, but it also allowed for room for the engine to torque on its mounts under load. I should point out that I have Cusco engine mounts and tranny mounts which lower the motor in the car about fifteen milimeters and stiffen everything up for less engine twist so that is also a factor for clearance. Without this, youĺll never make anything to clear the strut tower bar if you have one, and there may even be danger of the OEM intake pipe hitting the hood. Also, it turned out upon inspection that the OEM intake pipe is actually quite restrictive, tapering down tightly in its bend to the throttle body.
Needless to say, we fixed that too with a much higher flow design.
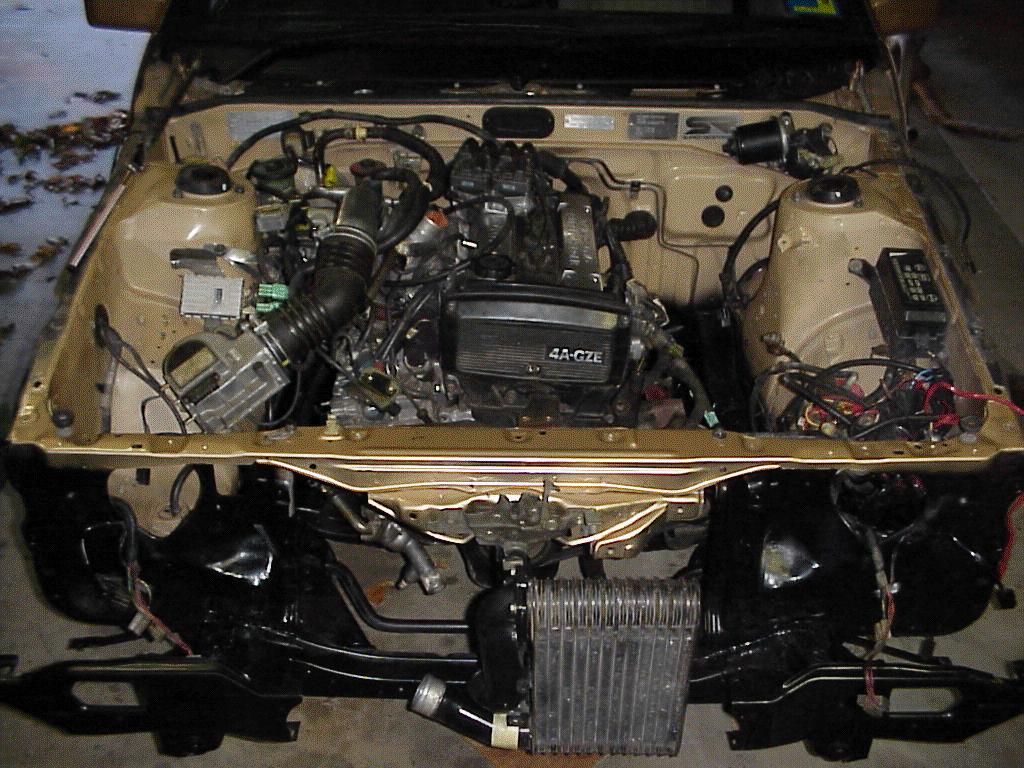
Lastly, and most importantly, you still canĺt close your hood! Because youĺre running a top mount intercooler right over the exhaust, the OEM hood will not close unless you chop out all of the frame work underneath. Even then, Iĺm not sure it would close. So, some custom piping is in order. Reusing the OEM intercooler is up to you, but in my experience it isnĺt very efficient. Depending on how you want to do this, there are several suggestions. First of all, the OEM 4agze intercooler should fit in the stock airbox location behind the passenger headlight. Iĺve also seen it in place of the battery behind the driverĺs side headlight. Or you can front mount it as long as you want to either put holes for piping in the car or get a new radiator that allows for clearance to the front. The second problem is rerouting piping.
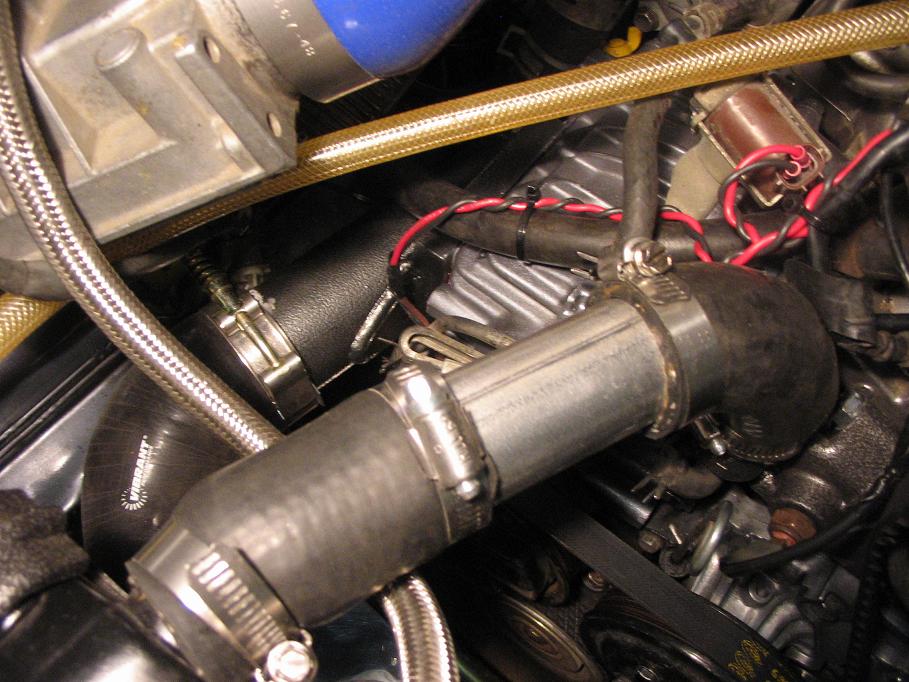
I got lucky and had a friend give me an intercooler. Itĺs a generic aluminium unit probably intended for the front of a DC2 Integra, about 27 inches from end pipe to end pipe. This just (just!) fits behind the OEM radiator, across the entire engine bay. My fabrication friend then made me a new supercharger pipe that runs the boost from the charger forward towards the radiator rather than back (like the mr2) or up (like the ae92). This pipe connects to the intercooler by a 90 degree silicone hose. The other side of the intercooler also connects to a 90 degree silicone hose which then pushes the boost back, up and over the headers and into the motor by a custom made pipe. This pipe was made using a generic mandrel bent 90 degree, two inch exhaust pipe and some straight pipe to add to length. The best part was that the intercooler is just the right shape that it actually sits tight from frame rail to frame rail, resting on the silicone 90ĺs. This means no crazy brackets and no paint damage, both of which are bonuses. It also left enough room for clearance to everything that could be in the way and for a coming radiator upgrade. I even think there may still be room for an electric cooling fan! The only downside is that it sits tight to the engine, so everything has to come out for belt changes or adjustments to tensionersůor you have to be really, really patient.
Since writing this, several tweaks have been made and a few problems have arisen as well.
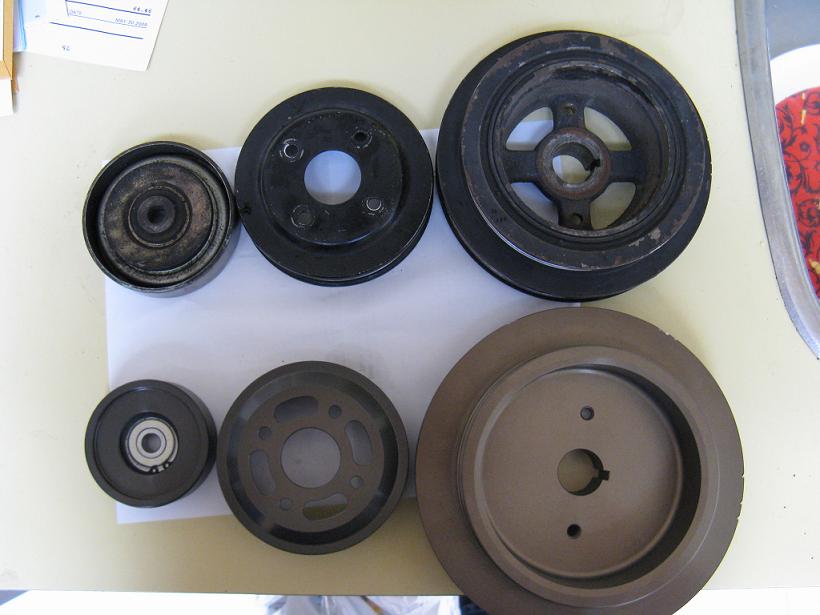
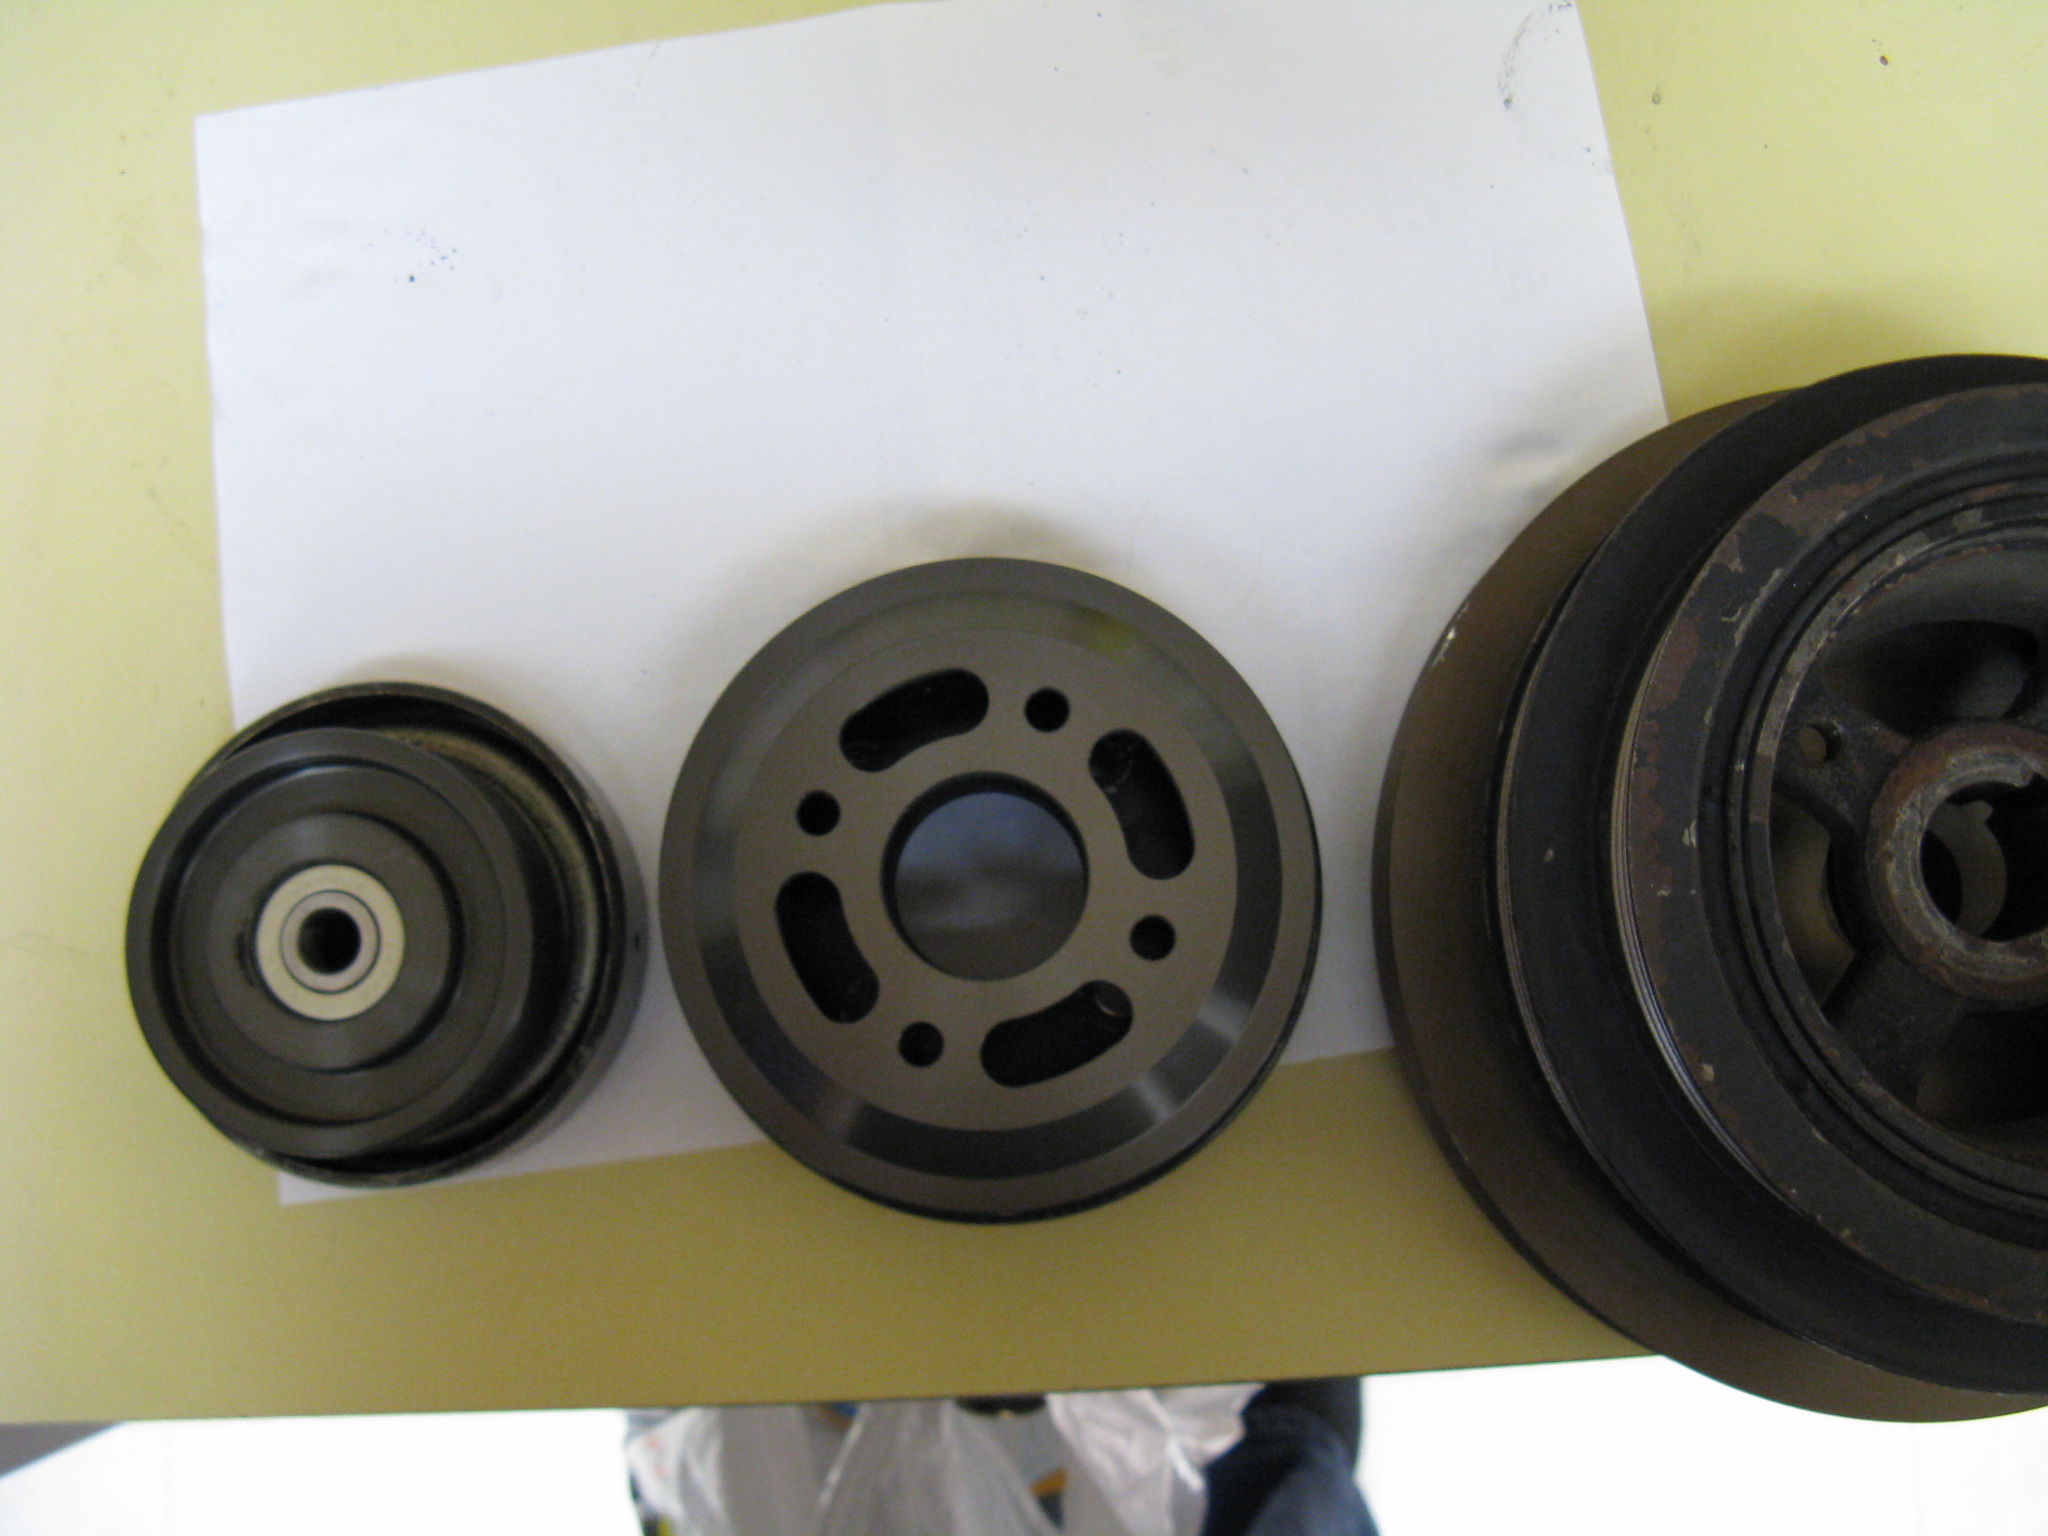
For starters, I procured an MR2 4agze pulley and promptly upped boost to 6-7psi at wide open throttle with no timing or fuel changes to speak of. Once the AFM was dialed in on this pulley, it ran full naturally aspirated spark timing with no problems while sitting four clicks clockwise from OEM on the AFM wheel. At this point, the car was already faster than Iĺd expectedůeasily breaking off any comparable car on the street. One night, to my surprise, a G35 driver decided he wanted to test my mettle at speed on a public road, only to get passed by the ĹRoku while I was short shifting the car up a hill. Needless to say, heĺll think twice before he does that again.
I noted that, however fun the car had become, it ran hotter and hotter as time went on. As I had heard, using an OEM ae86 radiator in conjuction with a 4agze is a bad idea. The car would spike in stop and go traffic to the point that it became a cool weather freeway slut, losing the ability to accomplish even the shortest journey in Urbania. Fortunately, I had the premonition of this a long time ago and had a 3 core aluminium radiator waiting in the wings. N/A the car saw oil temps in the 70-80c range or lower under even the most extreme forms of driving with EGTĺs in the 400c range. Once the car was at 4psi, these numbers essentially stayed the same, with EGT rising under full boost at WOT to about 450cůhardly hot. At 6-7psi oil temps rose to the 80-90c range (or higher depending on traffic speeds) and EGT rose to about 500c with spikes to 550c under severe duty or hot weather.
The car also suffers from a ôspurringö or ôlopingö idle. Essentially, as idle speeds the carĺs ABV canĺt suck enough air to feed the motor through the non-spinning supercharger and it tries to stall. The car jumps the idle to compensate, gets air, runs out of air, jumps the idle etc in an endless cycle. So, at stop lights its constantly pulsing between 1000-1500rpmůbrooOOM, brooOOM, brooOOM. It sounds neat and it is common to Roots-style supercharged applications in general, but it gets annoying in practical application. It also gives you away, should any other knowledgeable gearhead be nearby. This was defeated by disconnecting the throttle position sensor (which happened by accident). Once I discovered the reason, I quickly reconnected the TPS for the sole reason that it is responsible for the ECUĺsload-sensing ability and its loss could be catastophic. Further testing needs to be done on that one.
Once the car was running solid, I chose to jump to the ae92 pulley for even more boost.
Thatĺs when everything went horribly wrong.
For starters, I took precautions and enrichened the AFM about 3 more clicks. I also adjusted timing a whole cog on the distributor because I knew it was already maxed out in the direction I needed to go. Please note, when RETARDING a distributor, you turn the outside of the distributor CLOCKWISEůnot counterclockwise as I had been told!
So, once timing was set, the pulley was installed and I started the carůand all hell broke loose. It ran like a box of rocks on a stairmaster. It ran hot. Red hot. So hot, that from a dead cold start the oil temp rose to 100c within three blocks of my house and the heat needle was in the red on the dash. This feat would normally have taken 20-30 minutes of had driving, and it did it in about 1 minute. Soon the car was spewing coolant all over the place and I had a situation on my hands.
This happened for several days before I finally figured out the old fashioned way that timing had been advanced, not retarded. Once that was realized I turned the distributor two cogs the other way and the car soon cooled down to stone cold temperaturesůfor about one night. The next day it was back to its old tricks with a new twist.
The cooling system started overflowing and spraying coolant anywhere. This is usually a symptom of a blown headgasket, which allows boost pressure into the coolant over pressurizing the system. However, the car still ran fairly well, so I knew this was not the case. It wasnĺt until the car started blowing off radiator hoses that I figured out what was going on.
Because the ae92 pulley is so much larger than the 4agze crank pulley from the MR2, it turns through more belt per revolution than the old pulley. This, as a side effect, forces all pulleys connected to that belt to turn faster. The waterpump is one of those pulleys. Essentially, the ae92 crank pulley overdrove the waterpump enough to cause coolant pressure to exceed 1.3 Bar and cram the overflow tank with water. Once that stopped being the weak link, it started popping off weakly clamped hoses until it simply ran out of weak links and pushed a bolt out of a blocked hoseůresulting in massive coolant loss. Needless to say, the system has thoroughly been checked and reinforced and the car now runs as cool as ever.
One other spot that requires improvement is the silicone hose 90ĺs I was using as miracle joints. While they do a great job and are everything I needed, they have one serious flaw that requires address. Under vaccuum, they flatten, which restricts airflow through the ABV. This is a simple fix requiring some small pipe inserts or even using metal bends with straight joints and certainly isnĺt a do-or-die situation.
Current thoughts on the setup are simple. Stunning.
With the advent of the ae92 pulley, (read: the large 4agze pulley) the car generates boost the second the pedal is depressed. Even with a peak boost spiking in the 8-9psi range, it hits as low as 1500rpm and pulls on boost all the way to redline. The car is now capable of attaining speeds over 180kph in a matter of seconds, not minutes or hourly measurements. Those speeds werenĺt even POSSIBLE on the old motor. Passing in any gear is effortless, just put your foot down and it passesůanything. An unsuspecting Nissan Sentra SE-R V-Spec became the first victim to ôthe large pulleyö, and I assure you the driver had no idea how I pulled away from them. As one of my friends put it ôI was doing okay until about 140ůand then there was just no wayö that he was going to keep up to me. I had even missed third gear completely and had actually slowed down before that happened. If 4psi was night and day and 6.5psi was smile inducingů8psi is unholy.
An interesting side note. Even with all of these new parts in the car, large rad, intercooler, piping, manifolds, supercharger etc etc etcůthe car still only weighs in at 1070kg with a full tank of gas, tool set, fire extinguisher and 12 litres of coolant. The car had previously clocked in at 1040kg with half a tank of gas, floor jack and two jackstands. Iĺd say, all things being equal, the 4agze conversion only added 10-20kg to the car.
I have elected to leave the car alone for the rest of the season and actually DRIVE it for a while. Rest assured, many modifications are coming. Iĺm currently evaluating the installation of a 5mgte throttlebody, bigger cams, finding out whatĺs costing me boost (I should be making 10-12psi at this point), adding a smaller-pulleyĺd ae92 charger (or even a 1ggze charger!) and putting the car on an insane diet in the search of asphalt eating speed. It also looks like the 4agze has eaten 3rd and 5th gear synchros and is currently finishing off the rear endůso gearing alterations may be in the future.
I may even build a new motor. ;-)
UPDATE:
So, Iĺve driven the car for a couple of months since writing this page, and I should update progess.
I have managed to lean and time the car down to 4 clicks out on the AFM with significant timing input. Essentially, the car is running near-N/A spark timing without issues. Getting the car to this point also removed the jumping idle when parked, though it still does jump a bit during coasting and such. Setting things this way, the car is capable of spinning 195mm wide Bridgestone S-03 pole positions by matting the throttle at idle while in 1st, something an N/A ae86 just canĺt do period. Time from 80kph (50mph) to 220kph (130mph) is now measured in distance. Passing someone on the highway in the mountains no longer involves timing oncoming cars while taking a run up to speed from the rear so you can make it in timeůyou just pull out and put the throttle down halfway in 5th and the world goes backwardsůeven *above*the*tree*line*.
There have been no cooling issues, broken parts or unreasonable maintenance to note beyond usual oil changes and checking spark plugs. Even after thousands of kilometres, the car runs like swiss. Good thing this is impossible, or everyone might do this!
In fact, there have really only been three downsides to this whole thing. The first is that I waited 10 years (for various reasons) to do it. The car should have been built with one of these at the factoryůthatĺs how good it is. Secondly, everyone else thinks this canĺt be done, which is something Iĺve enjoyed disproving locally on many ocassions. The third is that, once people find out it can be done, this will all be the subject of internet-speculation with everyone talking about whether or not this kind of thing is a good idea and that I may or may not be on crack. It WORKS people. The proof is in the pudding.
The only detrimental side effect to the whole thing is fuel economy. The car went from averaging about 350-375km/33L to 350km/43L, or still better than the economy of a Ford Explorer. Still, I can pass those pilons any time I want? After all, my daily gets 800km/40L, and itĺs LEV C.A.R.B. certified, so I have nothing to feel ashamed of.
Update:
Having ran the car as above for the rest of the entire season I was quite happy with the resultsůuntil winter came and I got bored. So, I monkeyed with things (something I shouldnĺt have done) in the hopes for more power.
I decided it would be a good idea to generate more boost because the car was running quite rich on the top end. It ran around town at about 15:1 air/fuel but under wide open throttle (wot) it would hit 10:1ůextremely rich. This just meant there was blenty of fuel there to boost away with. I found that I got the AFM tuned down to 1 click from OEM clockwise, and it was still too rich!
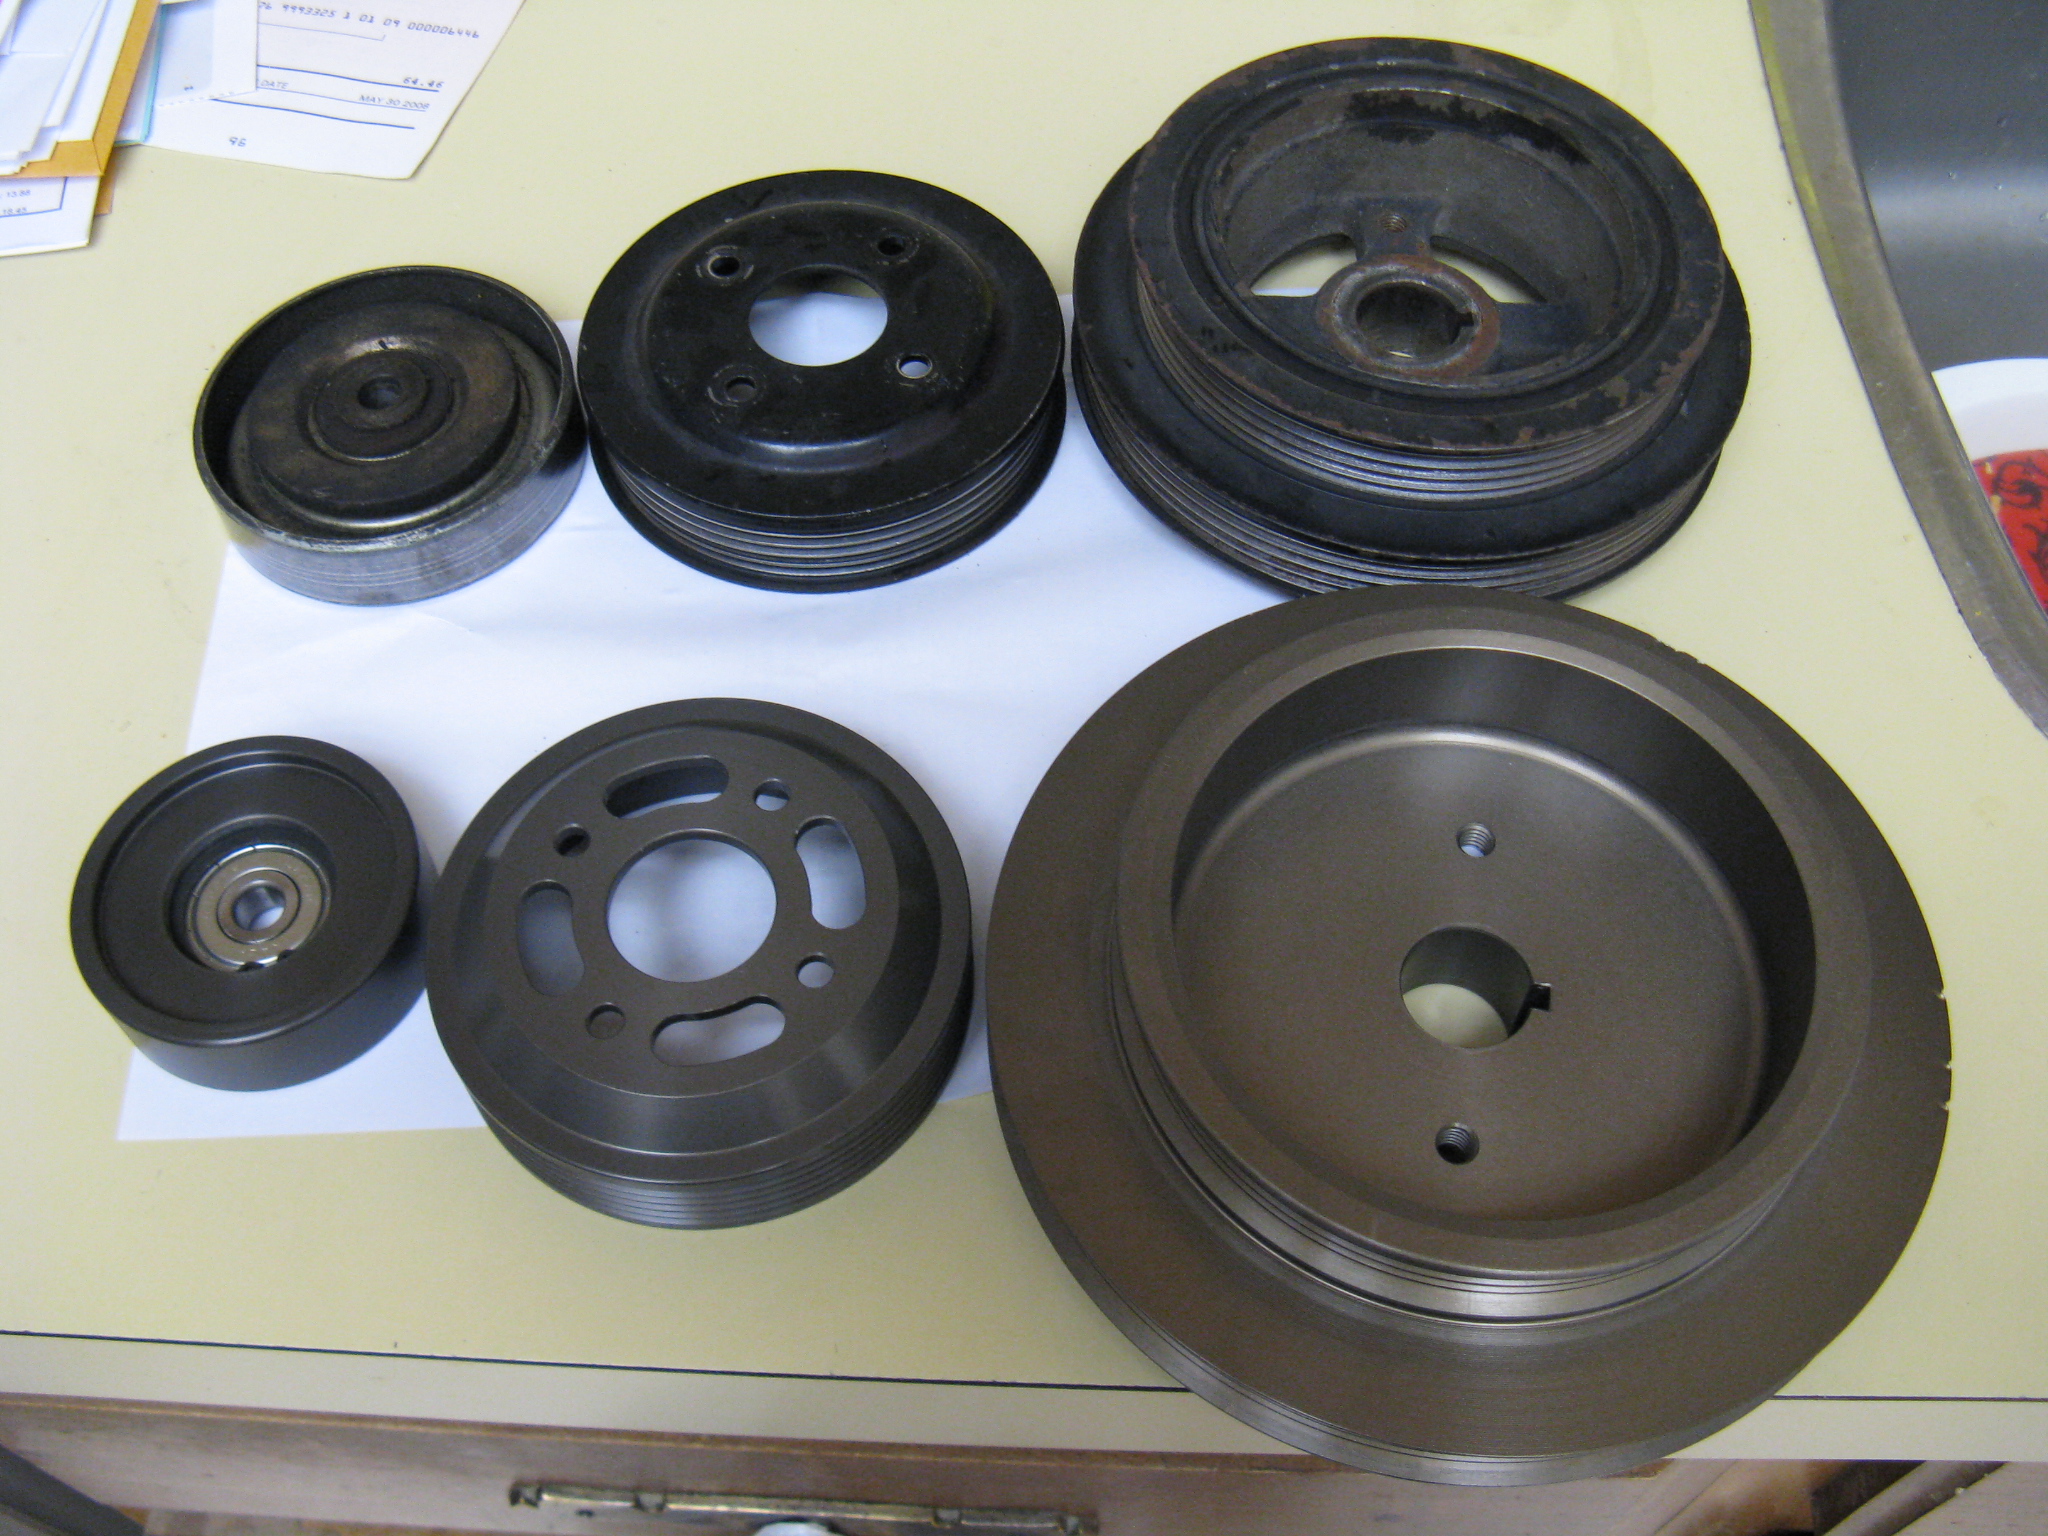
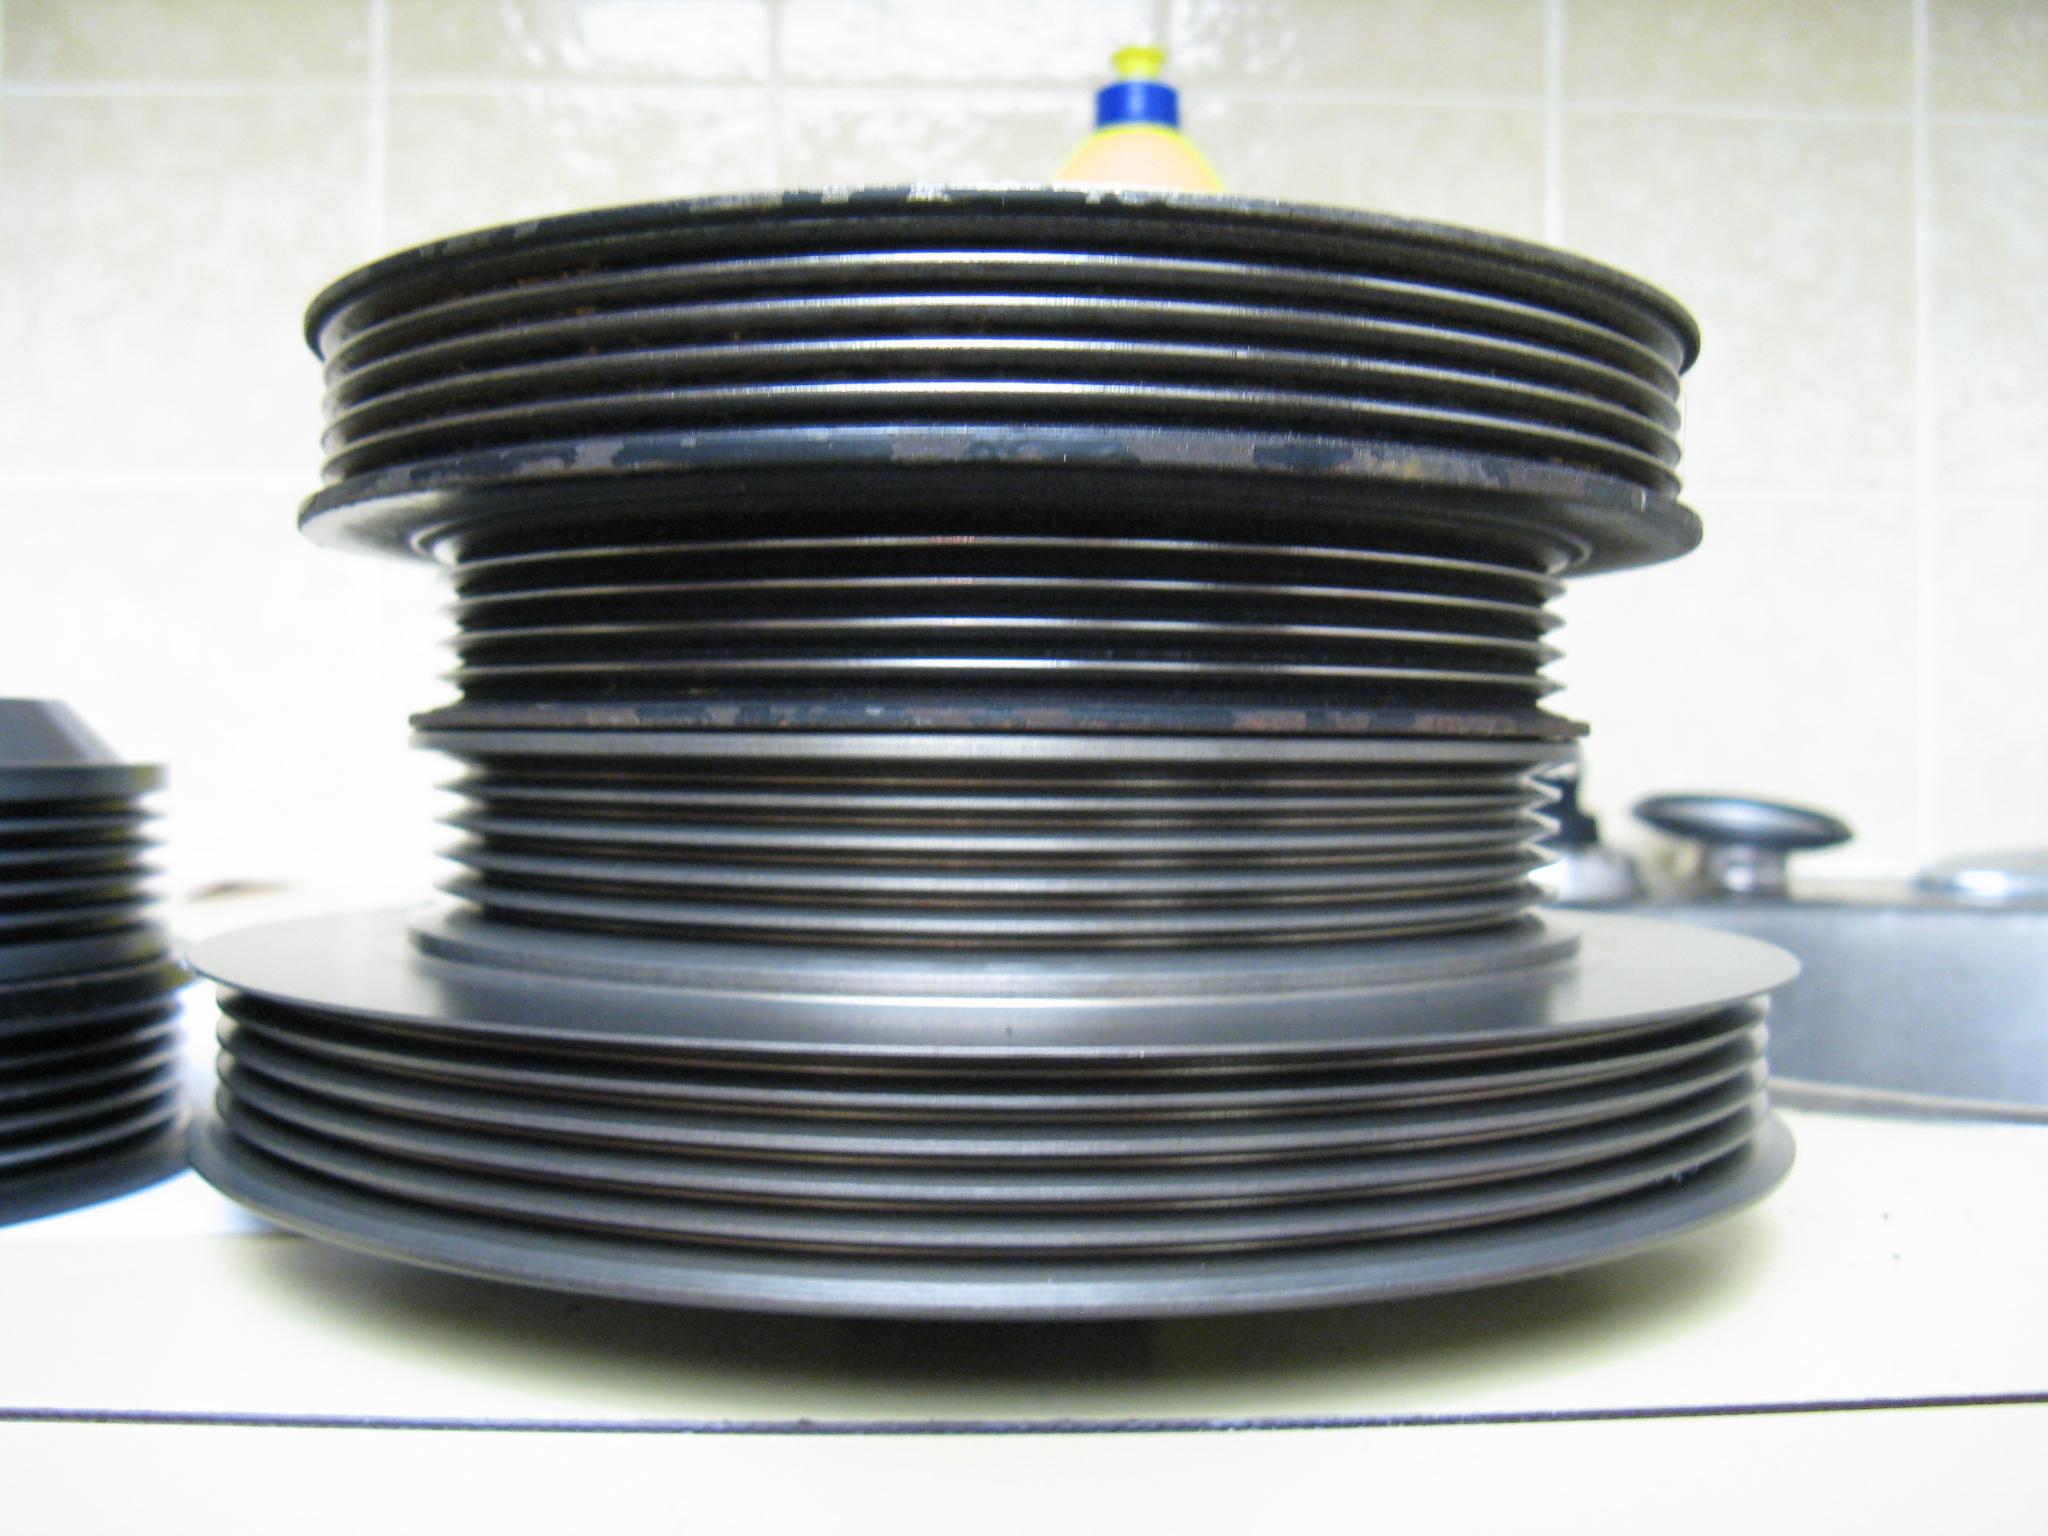
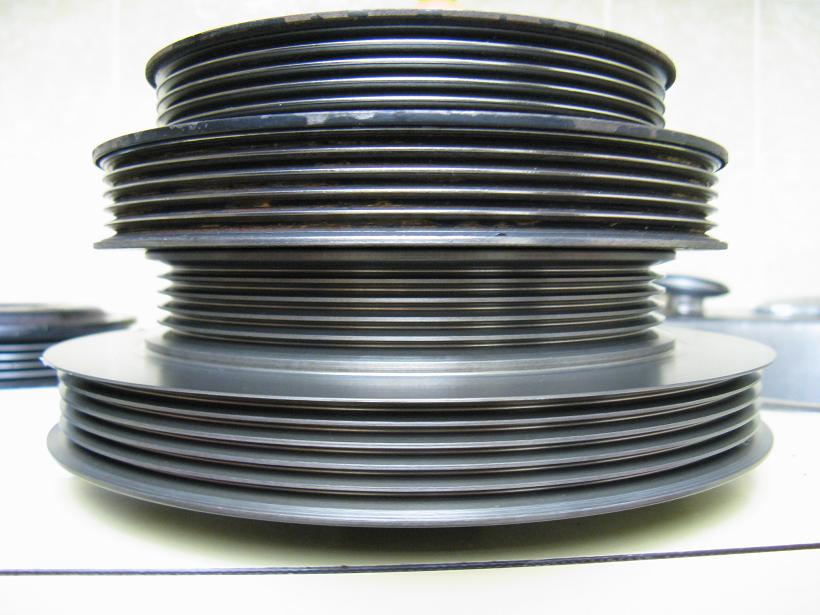
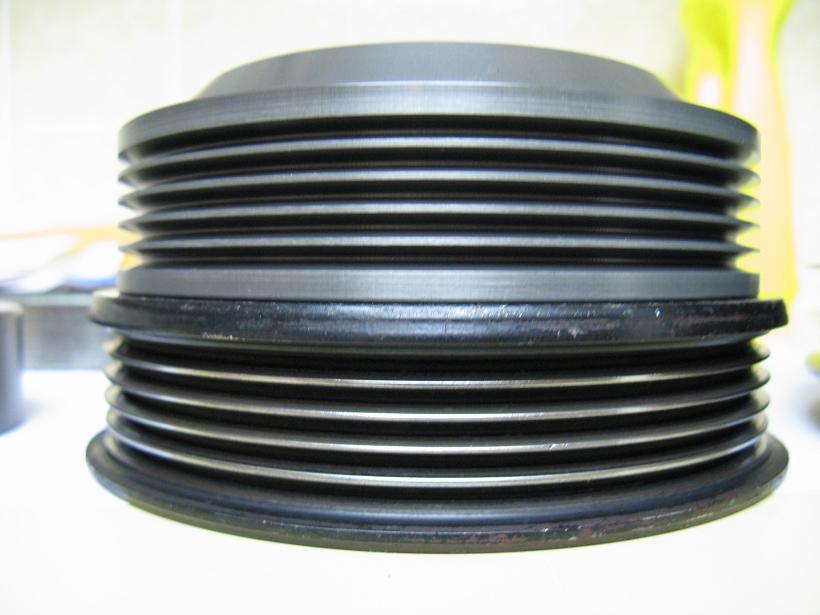
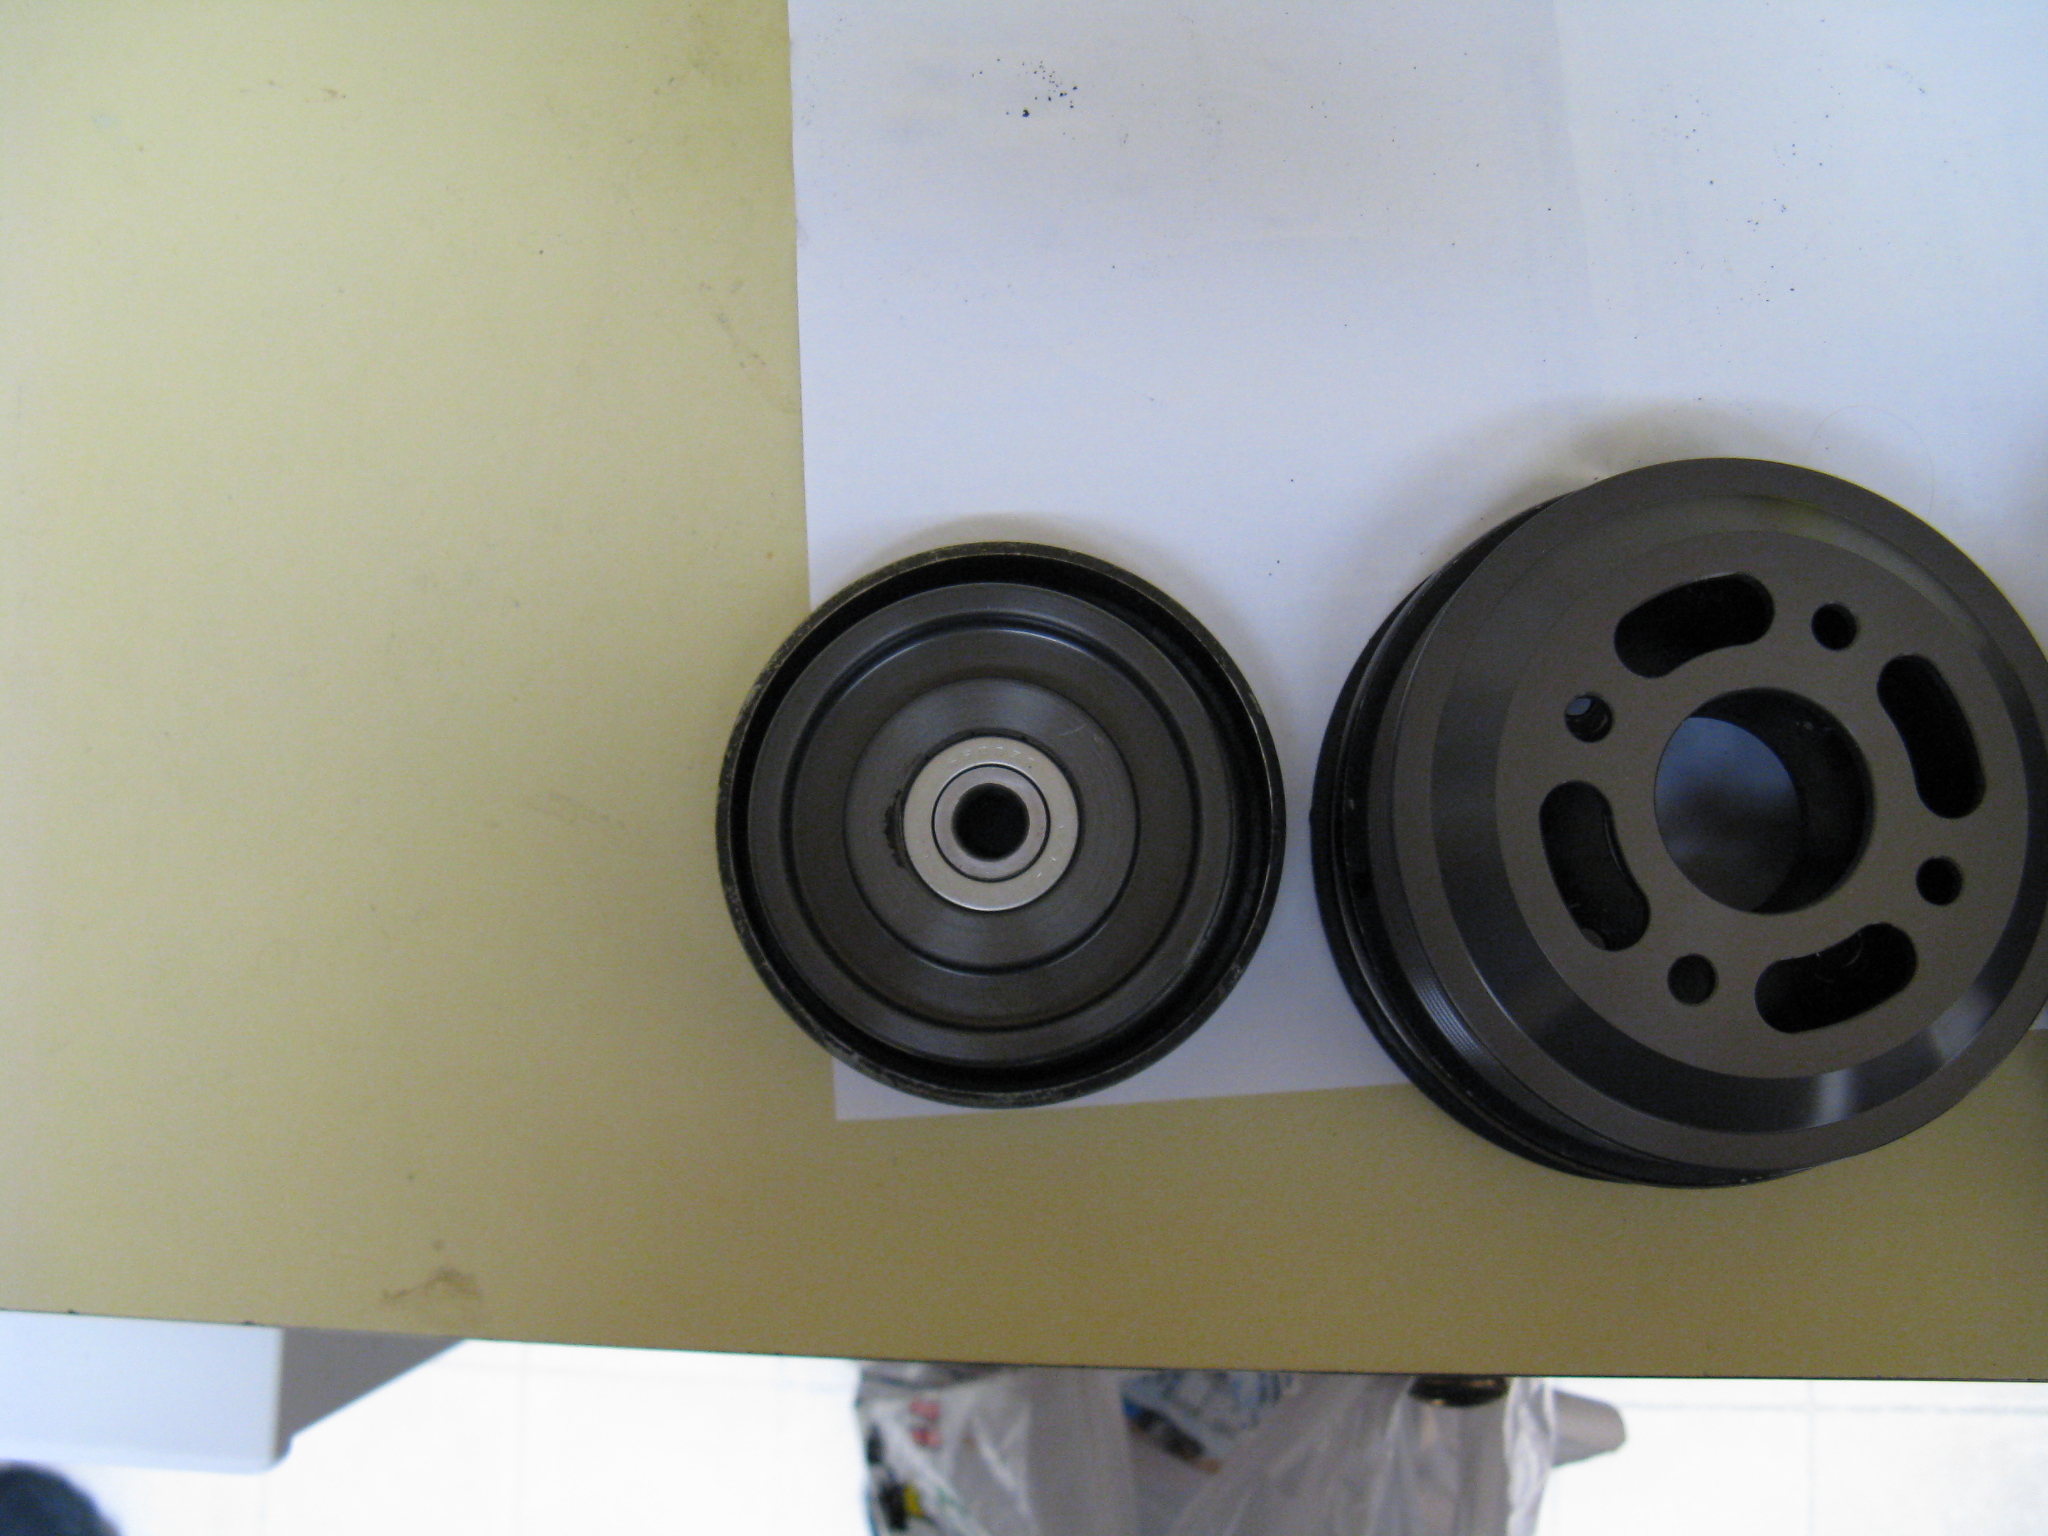
So, I did a little homework and decided the Non Stop Tuning kit was the way to go. Itĺs the largest 4agze pulley kit available, and its entirely made out of aluminium for rotating mass reduction. In fact, the whole kit weighs 2-3 lbs while the OEM pulleys weigh about 8lbs! Seemed like a good idea, so I bought one.
Turns out it wasnĺt such a good idea. For starters, NST is on par with T3 and BattleVersion in terms of quality and serviceůso donĺt expect results unless youĺre waving money, and all tech support ends on day of purchase. The machining SUCKS too, with the crank pulleyĺs center not having been finished so it didnĺt fit right. The belt they sent broke the first time I used itůbefore I even left my driveway, actually. The tensioner didnĺt come with a spacer so I had to make one or else it would have full contact with the engine and not turnůnot that it mattered because the bearing in the tensioner came pre-worn out so it had to be replaced anyway!
What should have been a 3 hour installation (including removing the intercooler, radiator etc) turned into days of running around fixing thingsů.which incurred more costs and only served to piss me off. Did I mention that the crank pulley was dropped before shipping so it arrived chipped? Just more bullshit from a wonderful internet retailer.
Anyway, I got it all fixed and installed. I also made the mistake of rolling back my timing and adding a few AFM clicks to enrichen the mix just in case of boost problemsůwhich I shouldnĺt have done. The car ran like a complete dog once on the road. This turned out to be a blessing in disguise for an unrelated reason, but in short, donĺt do it. Just install the kit and drive as per normal.
Once it was all installed and ready to go, the car just wouldnĺt make boost! It would hit 0.5 bar (about 8psi) like before with the ae92 pulley, and then it actually lost boost after the initial spike. It took me a long time to figure out why, too.
This was when I noticed the oil leak.
For some reason, my oil cooler lines (which are #8 Aeroquip AQP FBA steel lined hose) suddenly popped off while driving. Anyone whoĺs ever seen the steel braided hoses used on high performance cars knows that this is extremely rare and odd to say the leastůespecially after theyĺd been installed for years with no problems. Once I cleaned up the oil and got the hoses securely re-fitted, oil kept appearing in the same spots? It turned out my catch-can had started leaking oil and spraying it everywhereůand there was massive, massive blow-by filling the can in minutes! These were all the symptoms of a blown head gasket that I had become so familiar with the last season that I feared the worst.
I got out the compression tester and crossed my fingers. All four cylinders measured 190-195psi (which is extremely high) but consistent and good. The car ran fine, so what was the problem? Further driving tests broke more parts. One pull split my brake booster hose and shot the plastic valve-joint out.
Once that was fixed, the catch-canĺs hose split like a banana at the can, while ring-clamped. Once I plugged the catch-can line and hit boost with a rev-test, the dipstick shot out of the car and across the garage.
Discussion with a co-worker who owns a 11 second supercharged mustang led to one conclusion: Blow by.
Essentially, because the supercharger is cramming so much air into the engine, the pressure is getting past the rings and into the crank case. Yes, even with the stellar compression ratings, it still happens. So, the engine builds boost until the pressure goes by the rings into the oil system, at which point it breaks the weakest link. Itĺs supposed to go out the PCV tube on the valve cover as blow by, but the hole is too small to get rid of all of it, hence all the blow by in the canůit has nowhere else to go.
First was the oil cooler hose popping off the cooler. Once that was fixed boost got into the brake hose and blew it apart. Once that was fixed it went back to the PCV and blew the hose (and on later inspection, the catch canĺs internal seals which explains the oil under the hood).
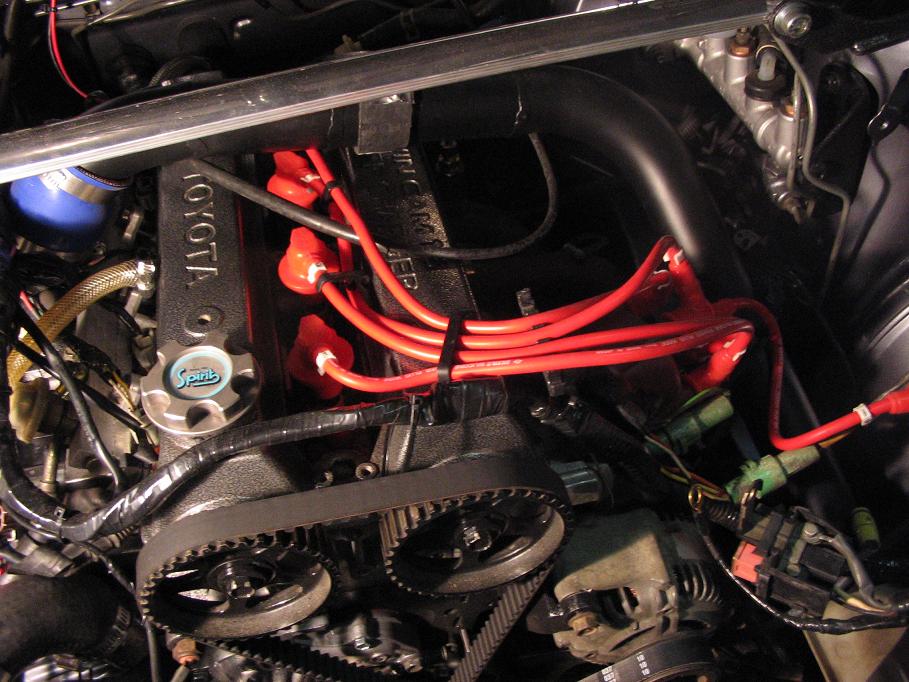
So, the solution? More PCV venting. Now, there are several ways of doing this on a car. For starters, Toyota knew it was a problem, which is why on the 4agze they made the valve covers taller by about 1 cm. They also made the PCV tube on the intake cover about 1/16th of an inch bigger (1mm give or take). However, once you start running insanely high RPMĺs or big boost, this just isnĺt enoughůremember that Toyota never intended this engine to do the things we do to it (within reason, anyway). Youĺve probably seen many 4ag powered cars run dual intake valve covers with dual oil filler caps and wondered why. You may even have seen a 4ag Atlantic engine and thought ôthose valve covers are massive!ö This is why itĺs done! The dual oil filler caps give you dual PCV tubes, which means 2 times the breathing area.
I made the switch to dual intake coversůits quite easy to doůall you need is a new valve cover gasket and 10 minutes of your time. Make sure to replace the rubber grommets as well as they act as oil retainersůyes, the boost actually pushed oil up the studs right to the nuts that hold the covers on! I removed the old catch can hose and the can itself, and ran two new lines (one off each breather) out the front of the car and vented them to ground. While I donĺt like spewing shit everywhere, I didnĺt see the point in getting a new $120 catch can only to blow the seals out of it again if the plan didnĺt work.
The results spoke for themselves. With no other changes, boost went up to .71bar (about 10.5psi) and nothing came out of the hoses but steam, which is what is supposed to happen. I note now that the car is still teething from poor tuning (its rich and timing is bad) but is totally driveable just like its old self. The blower belt is slipping on the high end due to pumping lossesůbut tightening the belt should help thatůhence the 0.71bar and not 1.0bar of boost. So, some more slight adjustments on the way and the results should be spectacular once its all dialed in.
Iĺm sure more problems will rear their heads, but Iĺll get through it. About the only other thing to note is that at 0.71bar the clutch is slipping at speed (I have a new one waiting already) and the rear end is really, really broken. More play than a kindergarten.
Update:
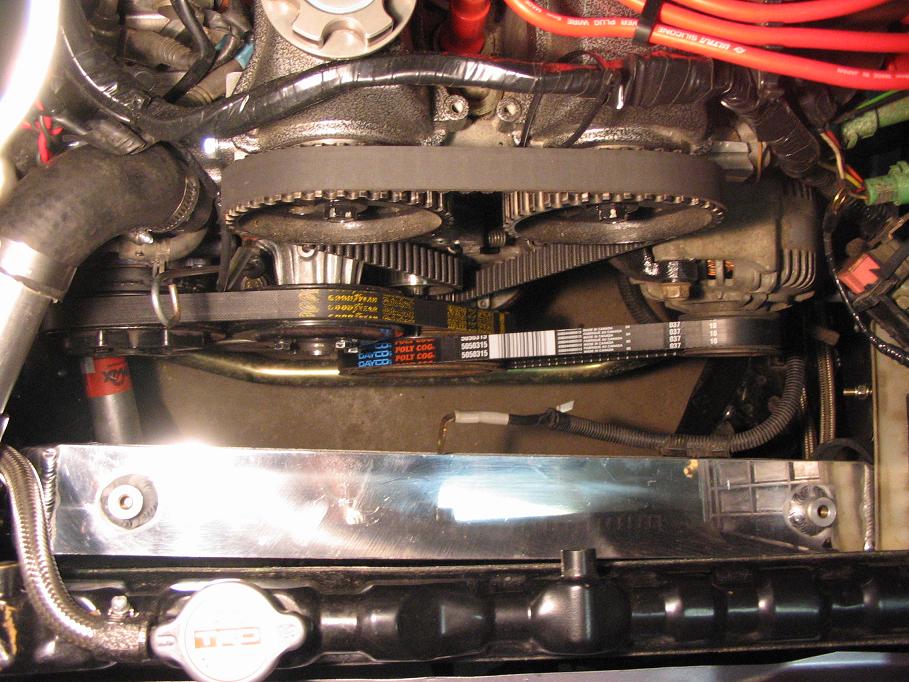
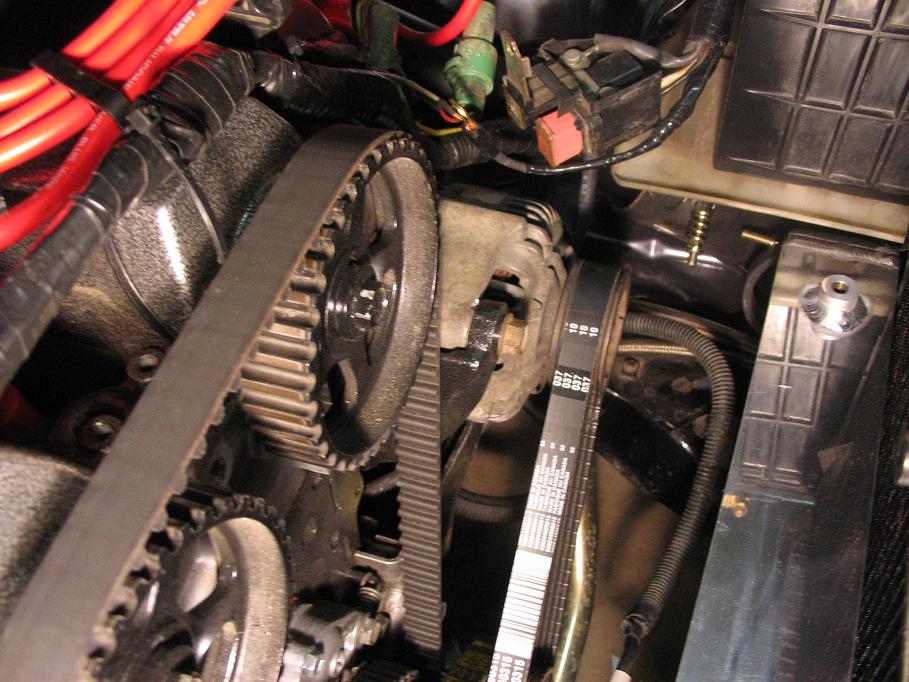
Well, things continued to get worse. I knew the blower belt was loose, so I went to tighten it. In doing so, I checked all the other belts to see how they were doing and discovered that my timing belt was so loose I could remove it with my fingers. This is odd for several reasons. Because the timing tensioner bolt now sits BEHIND the uber-supercharger crank pulley, the pulley would have to come off which meant Iĺd have to remove the radiator, intercooler etc. Or, I could get a wrench and machine it, slip it between the crank and engine and use it to just loosen the bolt enough to re-tension the belt and tighten it all back up.
The bolt head stripped halfway through that equation.
So, I removed everything and got it all replaced. It is interesting to note that Toyota 4ag timing belt tensioners are now only available from Toyotaůnobody in the aftermarket sells them anymore. Napa can get one, but its essentially $10 less and takes a month to get. It is also interesting to note that Toyota has re-designed the tensioner bolt to a 6 point style so that way a flare wrench will work in this situation and it wonĺt be a problem anymore. So, if youĺre smart and have read this the whole way through before you took your engine apart, order one and get it in there before you finish your project! Also, please note that the washer on the end of this bolt is NOT supposed to be flatůit should sit slightly tilted to one side. This presses on the tentioner bearing at an angle, which forces the bearings inside to turn and get lubricated. Its the same reason drive shafts canĺt be mounted straight.
The blower belt is slipping because superchargers take power from the engine to force air into the cylinders by compressing itůthe air inside the blower makes it harder to turn the blower as the pressure increases (pumping loses). This means that the belt has to be really, really tight to work properly. Once everything was buttoned up and I put the radiator back in the car for the millionth time this year, we were out on the road again.
The tightened belt easily generated 1.0 bar boost. Once the hammer was down the car takes off like its possessed and jams 15+ psi down its own throat at the touch of the throttle. Itĺll pull 0.9bar + once you hit full throttle and slowly creep to 1.0.
Earlier I had characterized its acceleration as unholy. I bought a G-Tech, and even the preliminary numbers should impress. The car repeatedly pulls 14.9ĺs in the quarter on the G-Tech showing 2550lbs of weight with my fat ass in the car while missing third gear and having loads of tire spin. A stock ae86 does this in about 18s. 0-60mph showed 6.8s, though I believe both the 1/4 mile and 0-60 times are under-rated. The G-Tech forces you to launch the car at high rpm, or it wonĺt sense the beginning of the run, which causes the wheel spin problem. According to the G-Tech the car is making about 165 whp and similar torque while pulling a/f ratioĺs near 12.3:1ůhardly optimal. Frankly I donĺt see how the car with working transmission and rear end wouldnĺt hit 13ĺs once the a/f was dialed in.
A few days later I took it out in the early morning for a run in the rain. Free tip: Donĺt take a gze powered ae86 out in the rain. Touching the gas causes the car to lose traction, period. In fact, I put the car 90 degrees to traffic at a stop light by putting the car into gear and giving it 1/4 throttle when it went green. At speed (20-30mph/35-50kph) the car pulls so hard in first and second that an EVO X didnĺt keep up with me.
I think thatĺs the real story with this setup. Its not the 0-60mph time or the quarter mile time thatĺs impressiveůits how fast this thing changes speed that blows the mind. To give you an idea, a friend of mine came up with a way to test whether or not we were improving our carsĺ performance with modifications using a stop watch nearly 15 years ago. We would find a bare road and get the car into second gear at 3000rpm. Weĺd then click ôgoö on the stop watch and pin the car wide open at the same time. Weĺd run the car up to redline (7500rpm), shift to third, run it up to redline again and stop the watch. This gives you about 30kph in second to 140kph in third gear, and the time it did it in. A regular time weĺd pull back in the day was around 15s. Most cars with intakes and exhausts would pull 14.5-15.5 depending on how ôbeatö they were. The best pull ever done was in an MR2 with cams, headwork, intake, throttle body, intake manifold, exhaust, ignition etc which was 12s flat.
The GZE in my car will do this in 9s flat, without cams, compression or fuel tuning in a heavier car with worse gearing. Keep in mind, this is 30-140kph in *non*optimal*gearing* in 9.0s. A recent Sport Compact Car puts this time on part with Ultimate Street Car Challenge winners.
Also, it looks like all those warning signs were correct. After I took out the EVO, the car started smoking. Looks like the headgasket went. It seems funny to meůIĺd always heard that headgaskets on 4agĺs either go in two seconds or two years. It looks like mine was bad before I put the blower on the car and it still lasted two years of abuse, culminating in several weeks of 15psi that finally did it in. So, its time to take it apart againůbut it wonĺt be soon. Iĺm going to spend a little time on my other car before I tear this one apart again. Spring will come soon enough.
Update:
Iĺve already started tearing into the motor. Thereĺs so much to do I just didnĺt want to wait. Thereĺs wiring to re-route, things to powder coat, loose ends to tighten up etc etc. I still think working on my car is therapeutic.
I intend to do the head gasket as well as the clutch, replace the tranny and fix the rear endůbut tweaks are bound to get thrown in at some point. Iĺm thinking camshafts for startersůbut weĺll see where it ends.
Update:
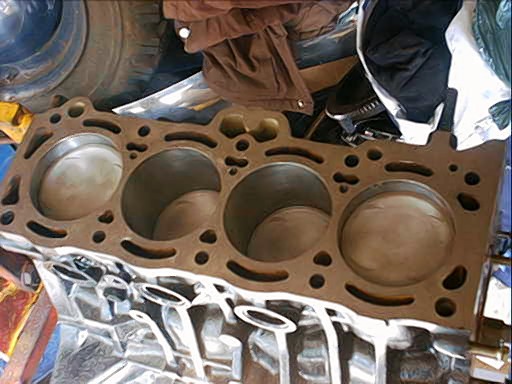
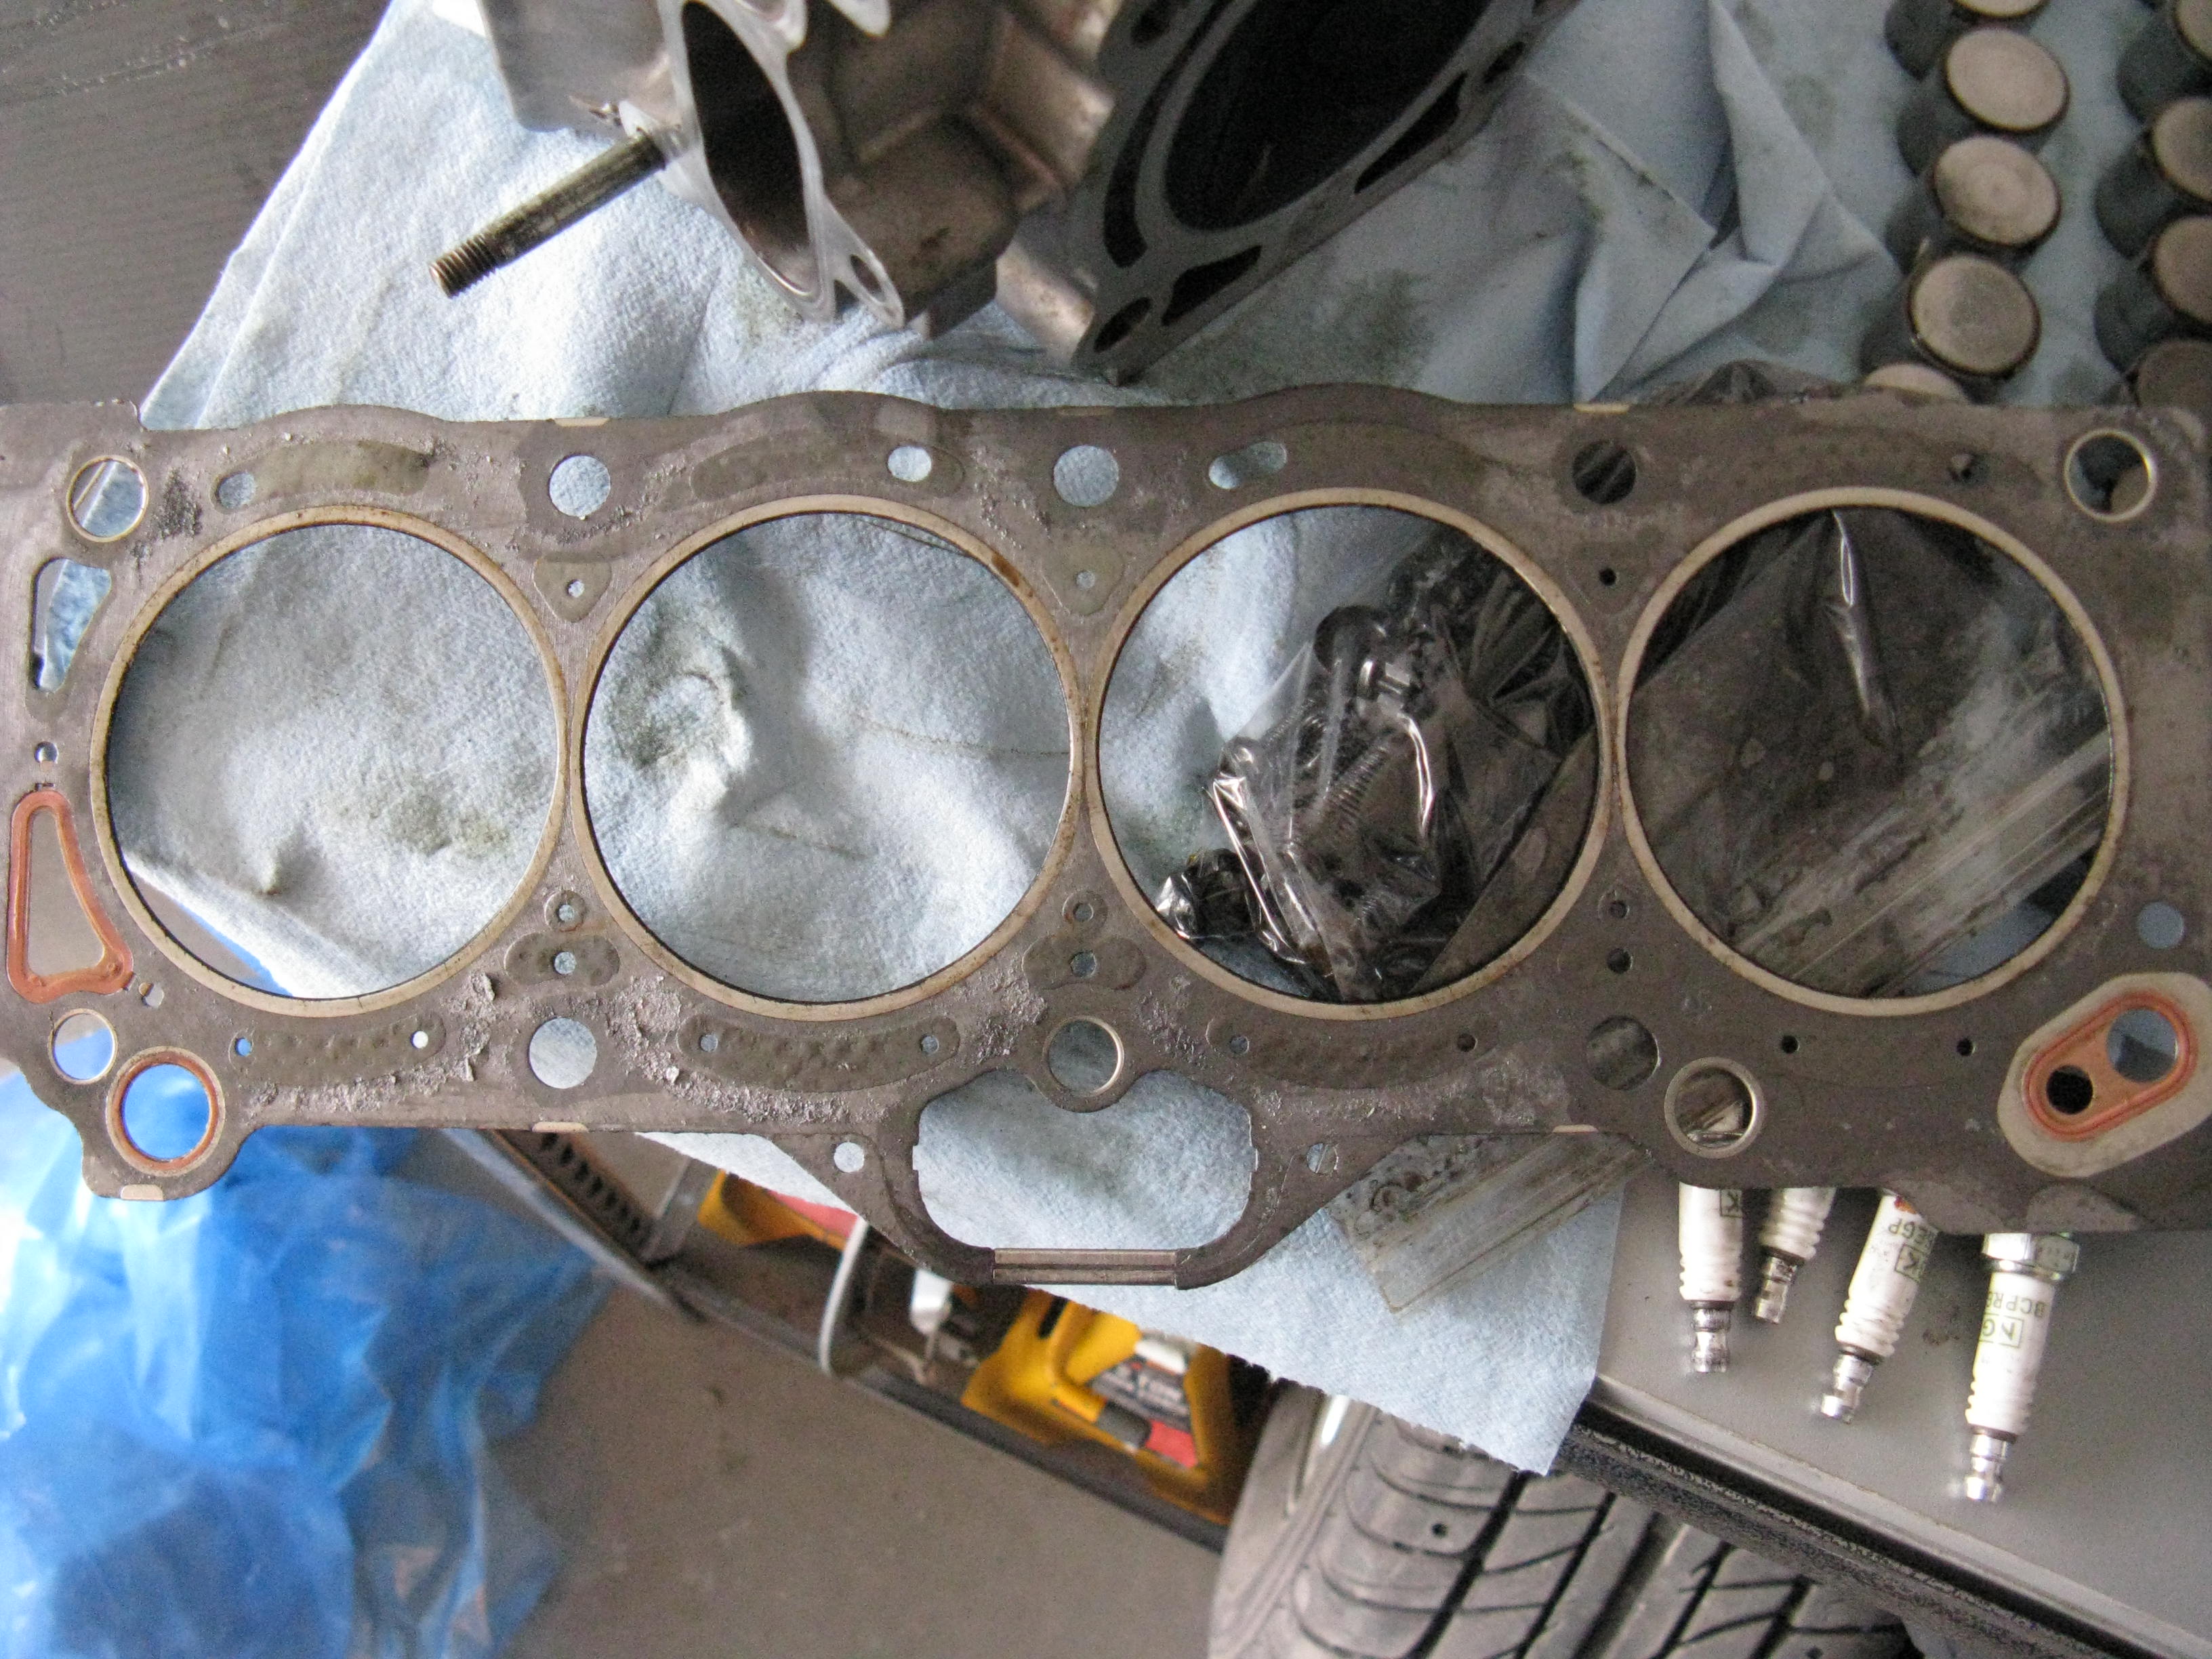
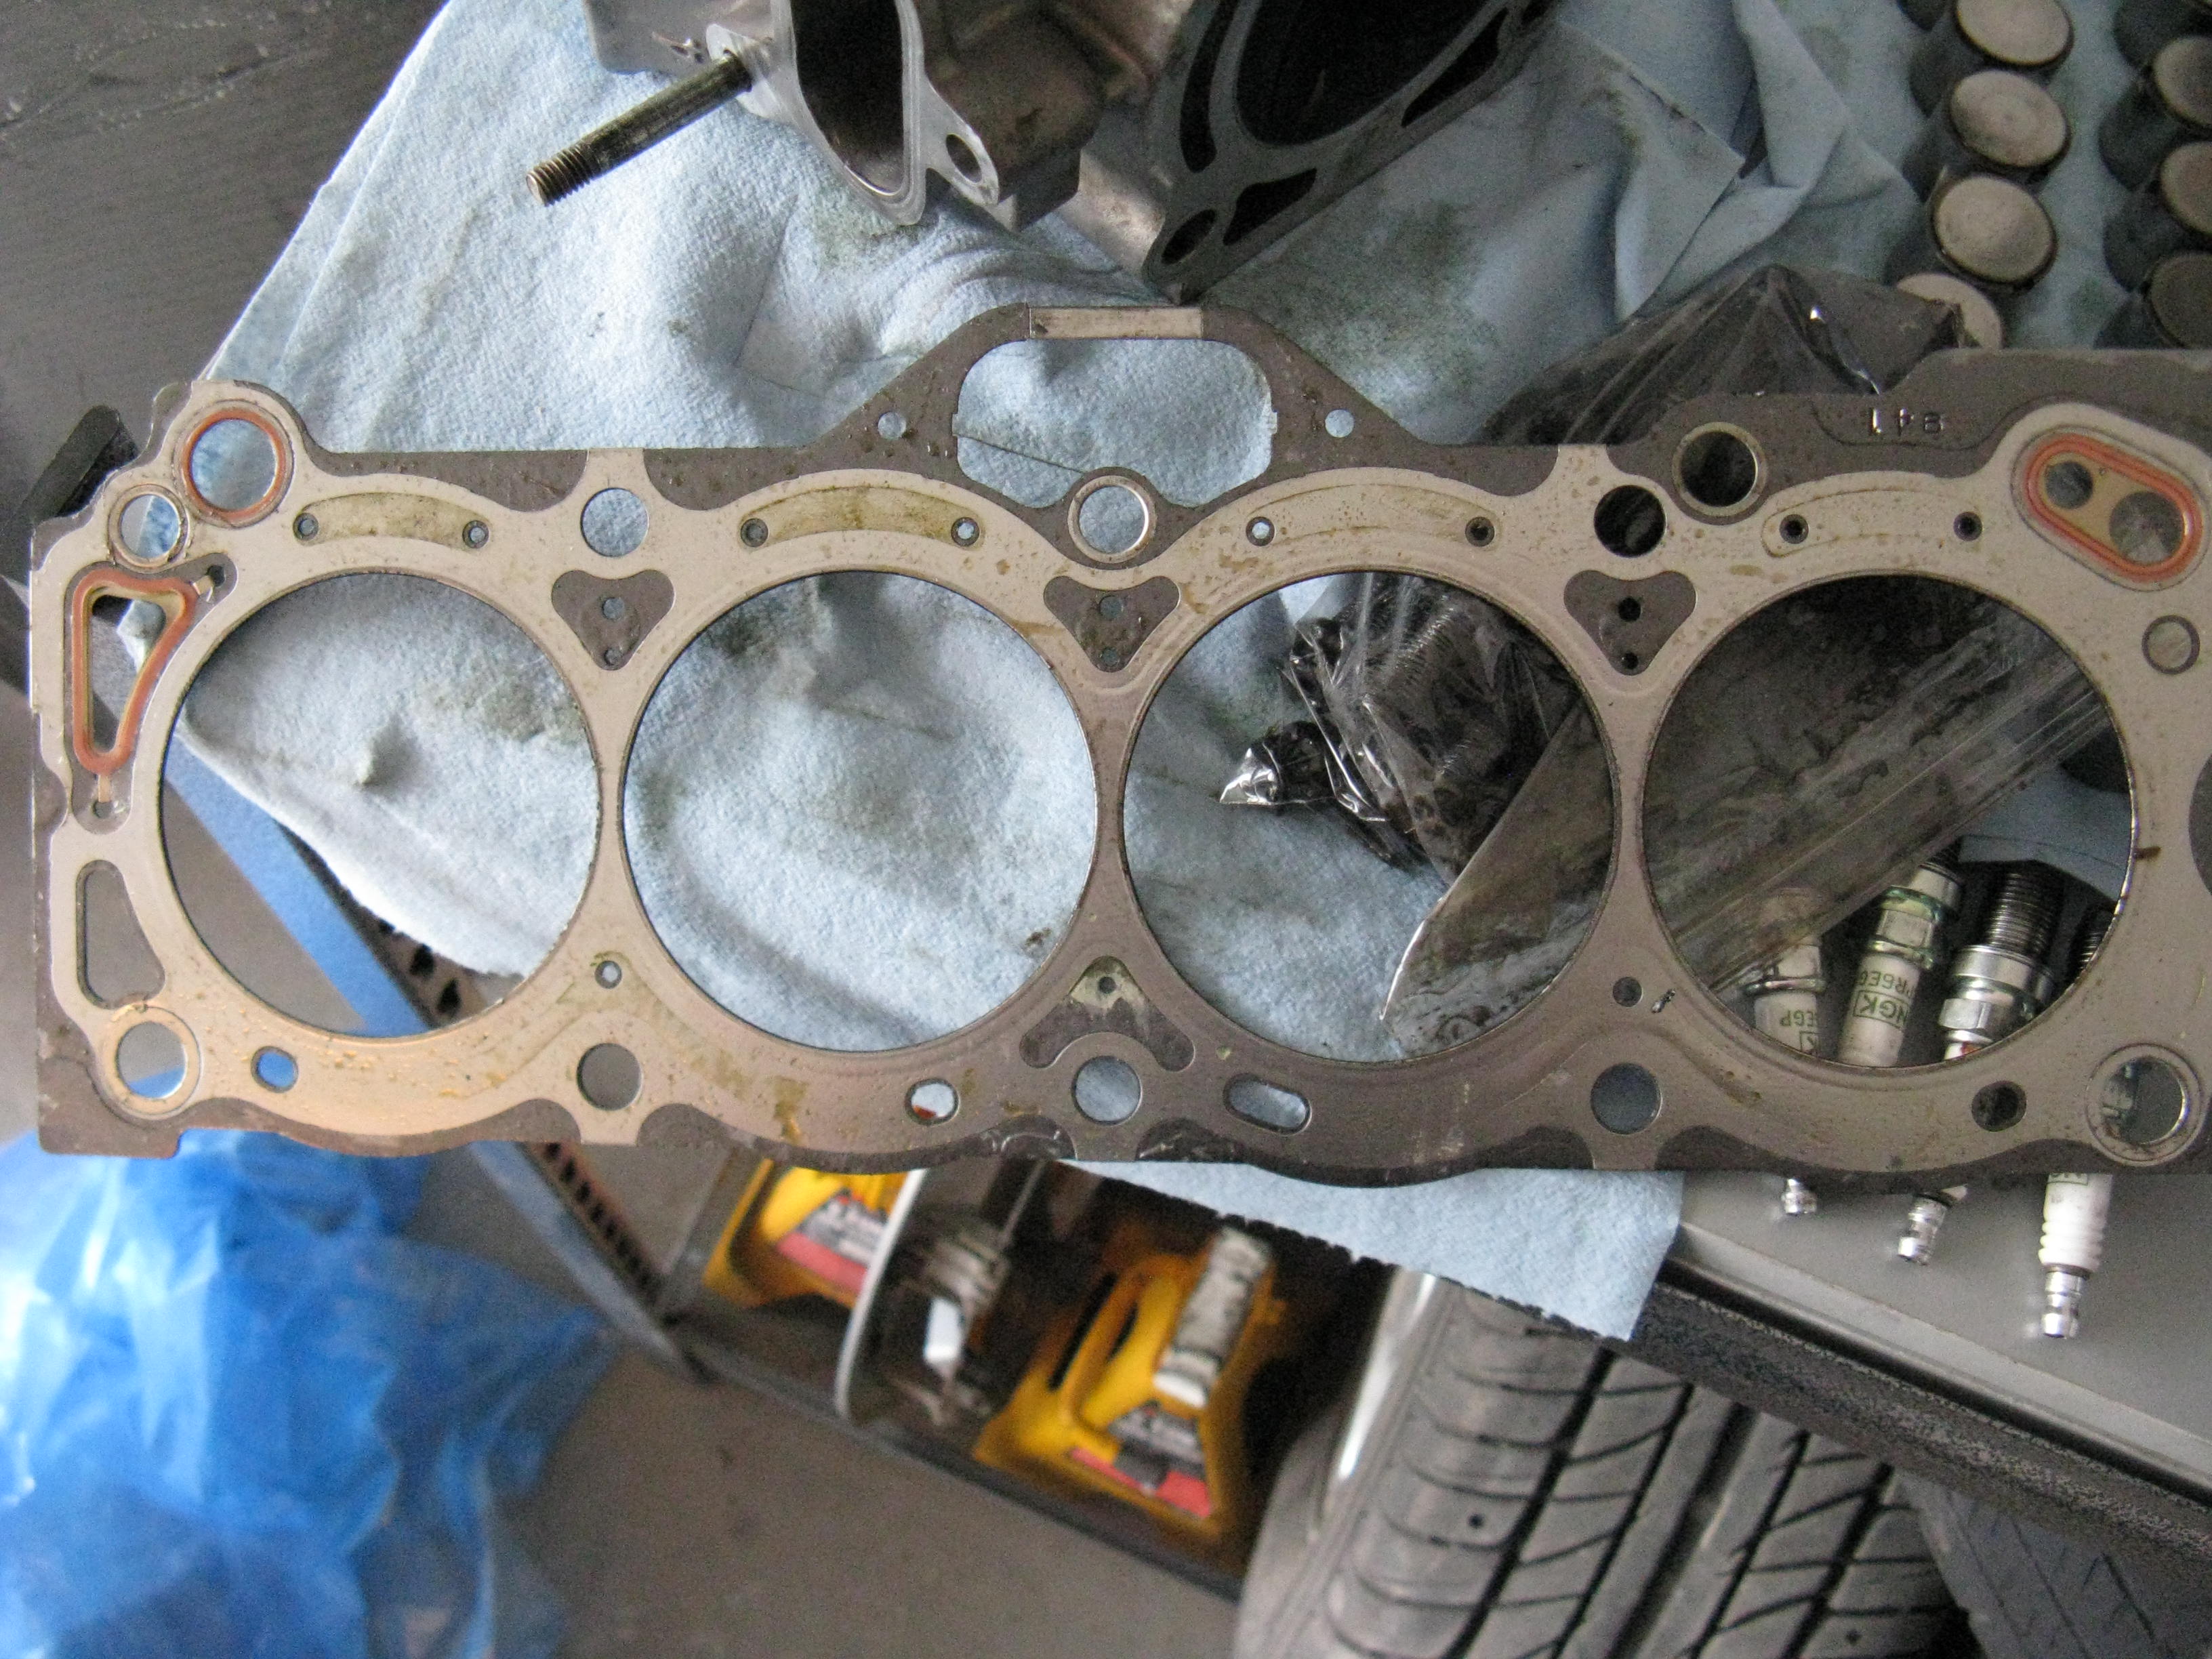
I disassembled the engine over the last little bit and took stock of a lot of things. Most importantly, the cylinder head and engine block seem to be flat below .002". I got a "machinists straight edge" made at a local machine shop out of some left over steel stock they had and used it to check the deck and head both horizontally, vertically and diagonally in near 1/4" increments. There was only one spot on the block that was questionable while the rest of the block and head were...as near as I can tell...perfectly flat to below .0015" Put it this way, with the exception of the one spot, there wasn't a feeler guage thin enough to test what the true limits were! I noted that the headgasket blew between the water jacket and cylinder on the silicone'd side on cylinders #1 AND #4...so not just one cylinder popped. This leads me even further to the conclusion that it was the silicone all along that has created this problem.
About the only other issue I noted was that my camshafts seem to be wearing significantly. There are lots of reasonably deep scratches on the cams at the rear journals on both sides, to the point where I'm not sure new cams aren't in order. Early 4age's are somewhat known for poor oil flow at the back of the cylinder head...its one of the reasons the small port block has a return line in the block that connects to the back of the head. Also, it could have something to do with the lack of angle on the motor with the solid engine mounts. These mounts (fitted forever ago) lower the engine in the car for several reasons, one being vertical weight distribution/moment of inertia and the other being lack of flex. This lowering levels the motor out in the engine bay, whereas the stock mounts keep the engine tilted at a significant angle. This angle could keep oil in the back of the head, preventing oil starvation to the cams. Gee darn, I may have to upgrade to new ones with more lift and duration.
Lastly, I ordered in all the replacement seals from Toyota...cam seals, valve cover seals and grommets, water neck seals, intake and exhaust gaskets etc. I also decided to try something new and ordered a Cometic head gasket. Cometic has been the darling of the import tuner world in recent years making headgaskets that are supposedly bomb proof. The company, however, is hard to deal with. They don't accept online orders from foreign countries. The 1-800# they have only works in the USA, unlike most which work anywhere in North America or globally. They also only ship by UPS, which is the bane of a Canadian's existance when it comes to shipping. Despite my pleading, they refused to ship any other way. So, to start I paid $89 for the gasket, which somehow turned into $95 once it was charged. This became $110 once shipping was added in, or about $149cn at the relevant exchange. $15 to ship a gasket seemed like a lot...especially when it took two weeks to arrive! To top it off, I had the usual UPS pleasantries. The guy at Cometic "forgot" to mark the package "shipee to clear customs" so UPS charged me $40 to do 5 minutes and $5 worth of paperwork. They then lost the package and had sent it to a secondary depot...which would have been nice for the lady on the phone to tell
me when I placed a "pick up" request on it. It also would have been nice for her to tell me which depot it was going to get lost at anyway, so I might have driven to the tiny one in the south corner of our city rather than the massive main one on the OTHER side of the city, some 30km away. So, I wasted two weeks of my time and $100 of shipping to get what appears to be a regular everyday metal headgasket in the mail. It's identical to the TRD one I've just removed in every way...except that the TRD one is conventionally available at a Toyota dealer near my house for $70cn. I doubt very much this gasket is 3X better than that one, but time will tell.
I've also taken in another 10 or so pieces for powdercoating...so more bling is on the way. That should really impress the tow truck driver when the engine grenades from all the boost again. :)
Update:
I've used the opportunity over the winter to pick up some loose ends. For starters, I disassembled the rear end and took it in to a driveline shop for repair. It seems that the shop previously assigned to install the LSD fucked up and didn't set the crush sleeve properly. This resulted in lots of play in the system. Fortunately, the ring gear and pinion showed no signs of wear that should cause concern. I also used the opportunity while I was in there to grease the caliper sliders on the rear brakes.
I also tore out the transmission and rebuilt it. 3rd and 5th gears were emitting audible signs of wear, and knowing that everything else is fresh and new, it was time to get it done as well. Fortunately, I had several transmissions lying around just in case because I knew the day was coming. The rebuild was sealed with Loctite 515 flange sealant and new head/tail seals installed. Because the tranny was out of the car, I replaced the clutch with a unit from Illegal Garage. I used their chromoly flywheel kit as well, which shaved 10lbs off the drivetrain. I am slightly nervous that the spring fingers on the pressure plate have such a low tolerance for throw (0.040" or 1mm from full off to full on), essentially indicating that it will drive like an on-off switch. It could be that my new plan to help driveline weakness could actually have made it worse. :) Time will tell.
I tore out the interior of the car and replaced all the bits with pieces I've been collecting from junkyards and friends for years. New carpet, door panels etc have been fitted. Also, I removed 50+lbs of stereo from the car. There was no point in having an IASCA championship stereo in the car if I never turned it on, and the weight of the deck, amp, crossover, speakers, kickpanels,
cable etc. was equivalent to half a person. Needless to say, this weight loss coupled with the driveline weight savings from the flywheel and lightened one piece driveshaft should make things interesting. Also, there's the weight loss from changing out my OEM seats that I haven't mentioned. I managed to pick up a pair of Recaro seats (SRD's? SPG's?) for a reasonable price and had Brian at Extreme make me some seat brackets. I weighed the OEM passenger seat (no air bladder or adjustability so its lighter than the driver's) at 37lbs. A Recaro seat weighed 26. A Sparco Sprint seat came in at a feathery 17lbs...two won't weight as much as the factory driver's seat! However, those are being saved for the sr20 coupe. Still, I'll take a loss of 20lbs in seating alone.
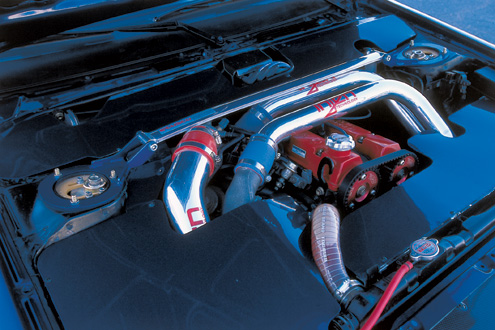
Lastly, the biggest change I've made to the car is in the engine bay. Because I had to tear down the motor to do the headgasket, I had already cleared out the engine bay. This left more than enough room to start giggling around wires and things. One thing let to another and soon Josh was helping me tuck and hide all the wiring. Dammit, we're going to have a clean engine bay one way or another. The only downside is I misrouted the water temp wire...so there's no indication as to water temp on the dash. Good that I have a Defi oil temp to watch over things, and easy enough to fix.
Update:
This year (2009) has basically been a wash. I got the headgasket in and had everything together and working...and then the clutch wouldn't hold. Seems the Illegal Garage clutch I had been given didn't like the 200ft-lbs of torque I was throwing at it. So, it went back to Max and he gratiously sent me a free dual diaphram upgrade for my troubles, which has been flawless! It has held my 15 lbs of boost from day one without complaint. Kudos again sir! Unfortunately, this sudden ability to hold power caused the engine to grenade again...still not sure what happened but coolant came out between the layers of the headgasket (!) and oil got into the cylinders...needless to say this resulted in the car coming home on a tow truck.
Once the motor was torn down again, the head was sent out for surfacing. It was only 4 though out, which isn't really significant. It got cleaned up and the gasket was replaced with OEM (why blow up shitty Cometic gaskets when you can destroy the best Toyota can design?). I threw in ARP head studs at someone's recommendation to hold it all together and it held! I had to heavily trim the distributor tip to clear the new studs, but it was fairly simple to do. Once everything was back in, I fired it up.
That was when the timing belt skipped 6 (count 'em...six!) cogs. Still not sure how that happened, but it did. Needless to say, one perk I have noted between an OEM and aftermarket thin metal headgasket is that the difference in apparent deck height really has an effect on how hard it is to get your timing belt on! While I did this, I threw in some upgrades...I installed a new AFM and a new throttle body. I had noticed that the AFM I have monkeyed with was set one click off stock, so I thought using a sealed unit would make it slightly leaner and leave a duct-tape covered mess out of my engine bay. Using an ae86 throttle body allowed for more airflow (47mm vs 55mm!). This didn't work however, as I believe the AFM I used to replace the monkey'd one is bad...the car drove terribly...and the ae86 TB has so many problems with all the airflow holes in it that driving the car was like riding one of those bumper cars at the carnival...no matter what throttle input, it still felt like you were getting rear-ended by some truck driving yahoo with no teeth. Both of these mods should return power gains once I get the holes in the TB plugged with JB weld and try again...but for now, they have to go.
This let me have a car I could drive. First impression...car is noticeably faster than a new Acura TSX from 20kph to 160kph. The new thermostat setup allowed the car to reach operating temp quickly...but the temp never went down, it just kept going up. And up. And up. In a
half hour drive at 80-100kph in cool summer night air with no hood on the car's radiator hit 110c on the outside. Current thinking is that the timing is too far advanced again, and that possibly the thermostat is too cold, preventing the radiator from actually doing anything other than holding off the inevitable due to too much coolant flow and not enough heat transfer time. Still, the car idled like an ae86, started like an ae86...it was well mannered otherwise. Unfortunately, now being so late in the season, it is unknown as to whether I will get this sorted by snow time.
Update: August 2009
The cooling system was monkey'd with extensively since the last entry with little result. A friend of mine and I attempted to remove what was believed to be air from the system by creative bleeding. The car was backed out onto the driveway, the rad cap removed and a coke bottle attached to the rad by duct tape with its bottom cut off. It was during this test that the car showed its true form, reaching red hot in few minutes at high idle and demonstrating 1) no coolant flow 2) the air bubble would not release 3) the lower rad hose / rear bypasses were still stone cold. So, the conclusion was a plug in the system at some point. So, the entire system was again disassembled and this time flushed with a garden hose. There was no noticeable difference running the hose into the rad and out the lower rad hose, so those appear to be clear. However, when run into the upper rad hose through the motor and out the water pump, there was a momentary and noticeable pause before onset of flow. This pause shortened more and more after repeated attempts until it reached a minimum...so it was decided that this probably ment whatever blockage had been flushed out. The cooling system was re-assembled and the car taken for a drive. Initial indications were that everything was kosher. The car pulled well, idled well etc and stayed cool much longer than normal..but soon the old tricks arose. Tempterature spiralled out of control at the half hour mark where it always went and the car was limped home.
I'd like to thank Edmonton's law enforcement community for stopping by to make sure that everything was okay. I was impressed by their attention to detail and helpful demeanor. Ensuring that the car stayed running while overheating and asking intelligent questions like "where the fuck is your hood?" while releasing the catch on their guns certainly improved the public's opinion of the force. I'm glad that the two officers directing traffic where the accident had severed the lights took time out of their busy day overseeing the six lane saturday-rush intersection to chastize me for missing a hood on my responsibly, middle aged driven car rather than watch the traffic and emergency vehicles that they were supposed to be safely overseeing. Interesting that they went after the sport compact driver, and not the guy who rushed the intersection ignoring the officers hand signals to stop. You're a true credit to society, gentlemen.
Update: August 2010
I said that I wouldn't work on this car again until my new sr20 project was completed. Now that the coupe is off for paint and has left me garage space to maneuver in, its time to hit the 4agze again. All those people who were saying that I left the hatchback because I wasn't capable of fixing it can fuck themselves. You know who you are.
Regardless of that, while the car was parked it barfed a large puddle of oil underneath itself...probably about a quart. The $64,000 question is where did it come from? There is no visible leakage off the pan or drain, the filter, the head, the oil cooler or its hoses...its a real mystery. This coupled with the car's overheating really leaves me scratching my head. So,
with the help of an eager student we tore into the car. He and I actually managed to get the entire engine disassembled in the car in about an hour and a half. Keep in mind this is from complete running car to bare block, including draining all the oil, coolant and taking off the strut tower bar, radiator, intercooler system, alternator, supercharger, intake piping, intake, fuel system & injectors, exhaust, timing system, valve covers, cams and cylinder head.
Initial observation shows nothing wrong with the car. The headgasket was visibly sealing by the markings left on it from the engine with no coolant/oil/cylinder blow-by or transfer of any kind indicated on the gasket. Yet, the coolant line passages in the headgasket were covered closed with some kind of coolant residue that made a small film across some of the holes. Now I'm pretty confident in saying that this has only happened since the car was parked because the water pump's force would have easily torn it open as it offered no resistance to my fingers gently poking it. It was so weak you couldn't even feel it on my fingers! The other odd thing about the head was that some of the studs were loose. This was only noticed when undoing the studs to pull the head...the #1 cylinder left stud nut stuck to the stud and pulled the whole stud out, which seemed odd at first. The right nut cracked and came off normally. But this pattern repeated itself down the engine, where one stud would be tight and the other loose. One was loose enough that I could have spun it off by hand.
Now, I find this very interesting for a couple of reasons. First, the studs were put in according to the manufacturers's directions using their recommended torque and chemicals. If the gasket was visibly sealing even though the torque was off, its certainly a reason to use Cometic headgaskets in the future despite the "PITA" factor. But, this leads to the question of what was causing the overheat? From what I can see, and I haven't had the head checked for cracks yet, it almost looks like because the head wasn't pinned down completely that the headgasket lost some of its ability to hold the combustion chamber's heat in, which would certainly explain the film in the coolant ports...its cooked coolant! The heat in that area of the engine would certainly be enough to cook the coolant in place, even after the car was turned off, which would explain why the water pump hadn't displaced it. I would have thought though, that if this were the case, there would be visible blow by between the cylinders and the cooling jacket because I highly doubt a poorly installed headgasket could hold back the 15lbs of boost I was feeding it. The other thing about the headgasket is that it has left some kind of sticky residue on the block...almost like a gasket maker silicone? Some of this has gotten into the coolant, though it is a minor amount.
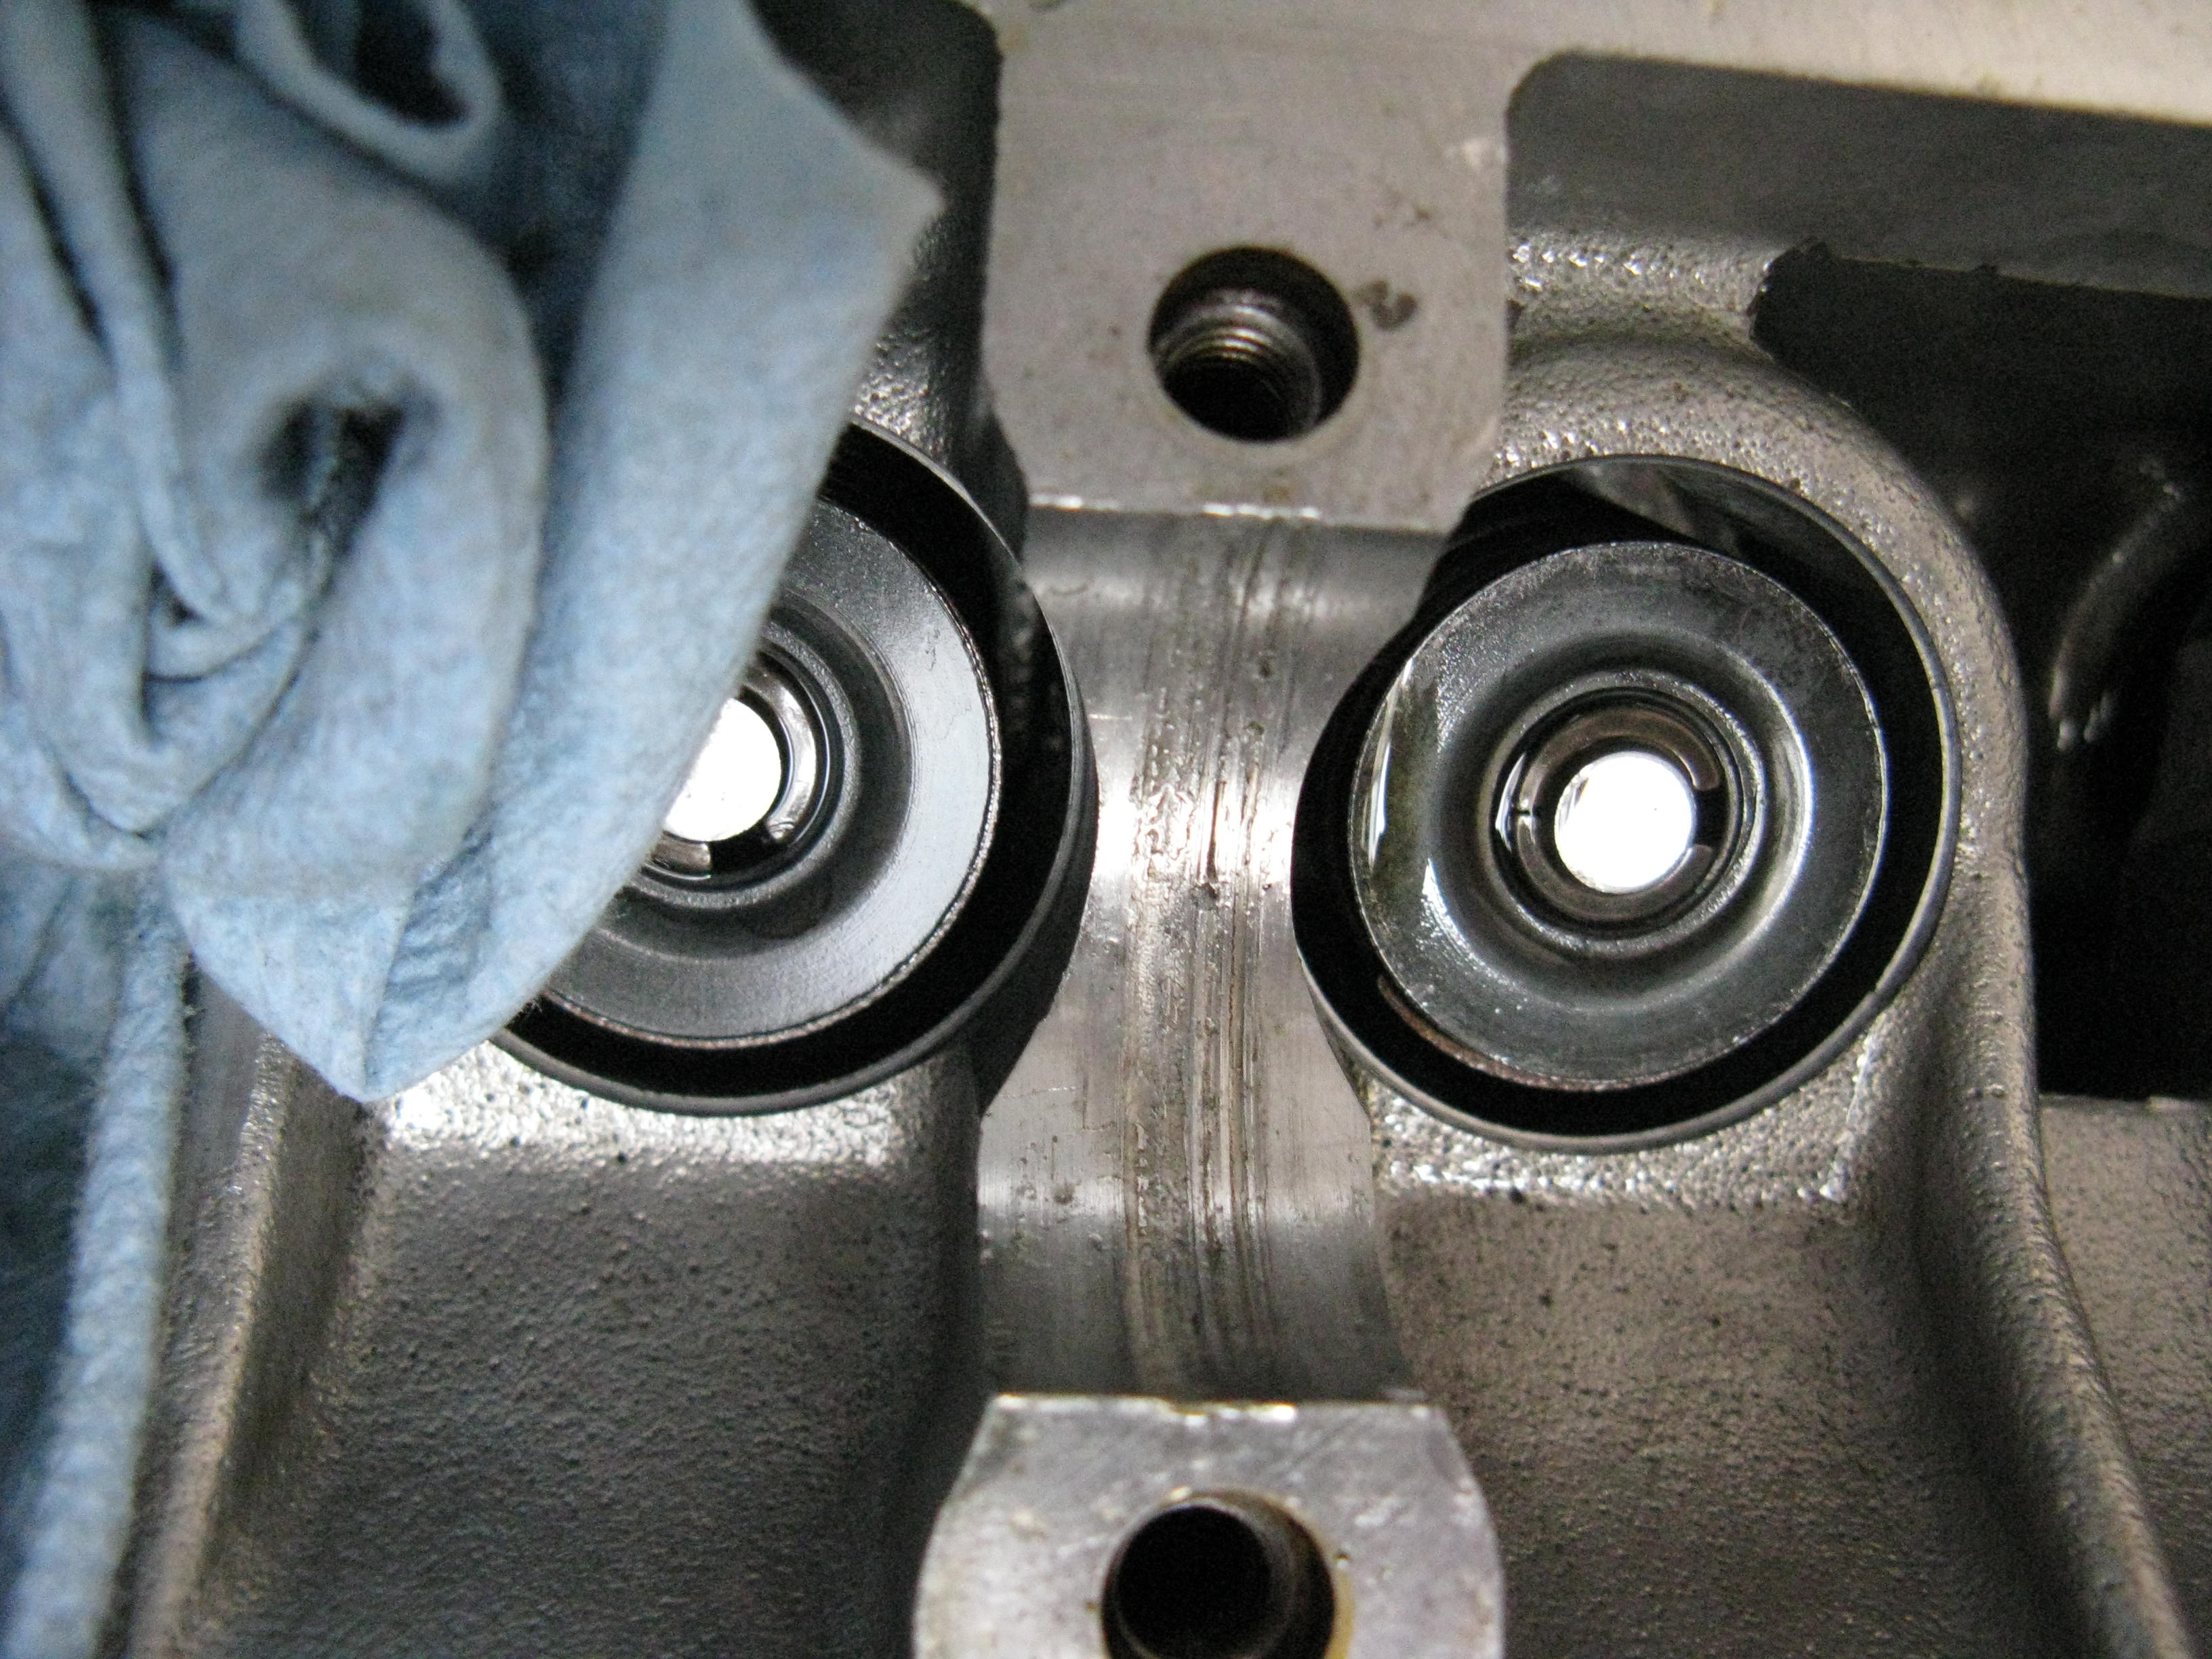
Last observation is that, while everything came apart nicely, the last support main on the intake cam ate shit during the last rebuild. Some how it managed to groove itself about an 1/8th of an inch deep (okay, not that badly) in both the cam AND the head journal. The only thing I can think of is that it caught something on it and used it like a saw blade. This is all quite strange because I know I cleaned off both the cam journals AND the cams before they were installed...so where did the debris come from? Is the cam saveable? Is the head saveable? Time will tell. For now, more questions than answers, I'm afraid.
Update: September 2010
I went back through this hole thread after finding nothing wrong with the engine yet again, and I've had the thought that perhaps after I replaced the headgasket the one time I failed to knock back the ignition timing enough. I noted that at one point I had to knock it out a whole cog...but I don't remember ever doing anything other than re-assembling it with timing at TDC. I'm having trouble at this point resolving the issue in my head because I know for fact the car overheats N/A as well as boosted and that the engine timing should play out differently in each scenario. So, I guess the only thing left to do is try it...check the block for flatness and then cross our fingers. At the worst, I shelve the car, put it on stands and take my time making a new motor...I'm just not sure what else to do besides cry.
Update October 2010
With the student in full tow the engine was completely re-assembled by the book. We checked the block and head for flatness and it was well within tolerances. The head studs were screwed in and carefully lubed using a whole bunch of ARP stud lube. We then used a friend's digital Snap-On torque wrench to make sure they went in exactly as specified.
Then we hit a small problem...cams. From a couple of posts ago you may have read that something got into the cam journal on the last part of the intake cam and it ate shit. Nobody was quite sure where the piece of crap came from, but it did a fair amount of damage. It turns out upon further investigation that the outside of the camshafts are actually shedding little bits of metal that look almost like grains of rice in terms of size and shape. We ground down the outside of the cams a bit to get some of the scale off, but I'm really not sure why this is happening.
The next hurdle was setting the valves. On a 4age, Toyota engineered a valve-and-shim adjustment system. The nice thing about this system is that the valve adjustment is a rarity taking several times the standard interval to require adjustment. The downside is that when its time to do the valves it takes forever. Also, because the valves actually wear themselves into their seat in the head over time, the thickness of the valve shims has to go down over time, not up...which means that as time goes on the valvetrain will tighten up, not loosen up. Because of this and the fact that the shims hadn't been done in quite some
time, it was time to set the valvetrain. This is really a simple case of doing math...measure the cam-to-shim clearance in various spots, the shim thicknesses for each valve...and then change the shims to create the idea clearances. Or so it goes. Usually you can move your shims around to make up all or most of the changes you require, but all of mine were too tight and this meant sourcing thinner shims. There's only three places to get them: Toyota, a Toyota repair shop with lots of 4age parts around or friends. I made the mistake of going for option two when I headed for Silverstone Automotive.
Now, I've had a bone to pick with Raymond at Silverstone for a long time. We don't tend to get along mostly because he's a "my way or the highway" type. He's also been responsible for reinforcing a lot of the bullshit information that goes around about 4age stuff. The shop has a dedicated small following of customers...but my friends and I tend to avoid the place unless we must go there with no alternative. I should have gone straight to Toyota. I asked Raymond for the shim values that I needed and of course, he started arguing as he always does. I made the mistake of telling him what shim I needed in thousanths of an inch. Because Raymond only does things one way, he started arguing that I didn't know what I was doing. Simply put, he's not smart enough to actually CONVERT THE VALUES IN HIS HEAD so that means I must be the one who's stupid. And then he wanted more for the shims I knew I needed than Toyota did. Needless to say, I left without the parts I needed and had wasted an hour of my time arguing with someone who isn't very smart or helpful and becomes overly difficult when confused...which happens a lot. Guess that's what I get for going to a shit talking jackass who's never accomplished anything in the local scene and can't build a 4age or 5mgte to take boost much less wire one into a car. My mistake. I'm sure there's a few local people who will read this and have something to say...you guys make your own call on their workmanship but I know where my money's staying.
Once the valves were set, everything went fairly quickly until it came time to start the engine. I put the stupid camgears on backwards again in a rush (totally my fault, I admit) which left us scratching our collective heads as to why the car wouldn't start. Once that was solved, the engine went together quickly and with relative ease. Thanks to Mike for coming out so many nights, keeping me motivated and pushing for results.
We stuck it together and ran the car...it started on the first key turn and idled like a champ. Not wanting to risk another incident, I immediately put her in gear and took Mike out for a spin. We ran her hard for a couple of blocks and brought her home...quite hot. The trip around the neighbourhood had raised the radiator temp to 65c in about 2 minutes with the hood off and no thermostat.
On a hunch, I knocked the engine's timing back a whole cog on the distributor the next day and took it out for another spin. The car stayed quite cool. The short drive clearly indicated that the timing had created the problem...with no other changes the rad was a steady 45c when I got back and stayed cool the next three nights out. The outside temps have dropped so much with the onset of fall that I had to start card boarding the rad up to keep even a hint of temp in the motor. Needless to say its fixed and it was all me, just like I'd thought.
Update October 2010
So, of course the next thing I did was take it apart again.
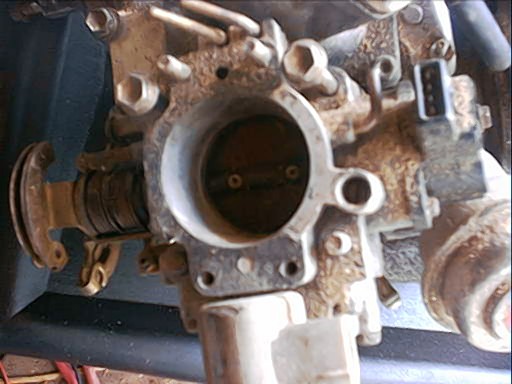
Because time in the season is short, there was a modification I wanted to try. My biggest complaint about the 4agze is the way the engine's intake system is configured. Over time I've had good luck replacing most of it with larger less restrictive bits, but the throttlebody has always been in my mind as something that had to go. I've tried a 4age tb off an ae86 on the 4agze in the past with little success. Some Aussies had suggested that this was because it controls idle and the 4agze one does not...but that never made any sense to me because if that were true the car couldn't idle on the 4agze tb...something it does quite well. So, I got a spare 4age tb and plugged all of the vaccuum holes, vents and ports with JB weld to mimic the lack of airflow on the 4agze. That seemed to work fairly well at first. The engine was a lot more..well, responsive and ran at better Air/Fuel ratios at part throttle. At full throttle it was a dog, running far too rich and dropping idle at the lights so that you had to hold your foot on the gas to keep her alive. I have not tried adjusting the idle screw to compensate nor the TPS. On the 4agze body I showed early on that the TPS had no effect on or off, so I'm not sure if that would have effect here either? No matter...I may even have ineffectively plugged the ports in the tb in the first place. Work in pogress, I guess. I've been told a 3sgte one will work, plug and play.
I'm also actively shopping for cams and gears to stick in this thing...but I really do believe that there's more to be had in terms of airflow. The intake tube on the far side of the intercooler needlessly narrows because the part on the intake manifold narrows. All of that could be improved to some degree. As for now, the car has been bathed and put down on a bed of swan feathers for winter. Its far too cold outside to deal with her now and she's had a tough year.
Update Halloween 2010
Because I could, I followed up with an old tradition my friends and I used to have, and took her out on Halloween. Took her out with my G-Tech, that is. Car weighed in at 2440lb with me in it, as per the weigh scale out at the Jelly bean. With this info put into the G-Tech and the car on a slight uphill grade, I ran her through the paces and pulled off some interesting numbers. According to Tesla Electronics, the car went from 0-60mph in 5.9 seconds and the standing 1/4 mile in 13.9@106mph. They also claim 156hp and 170ft-lb of torque. This is while making 12psi w/ no cams, half of first gear going to wheel spin and air/fuel ratings at 11:1 or lower. I really do believe that I can take another full second off these times through various means like better tires, a spinless launch on flat land and a couple of tweaks to the car. Either way, its nice to know that I'm doing all of this without cams, missing 3lbs of boost, bad air/fuel etc etc.
Not bad, not bad at all.
Update: Christmas 2010
Because the season ended without much closure...I got to thinking. Usually that ends badly. I need to find a way to get the A/F ratio way down. This has always been a problem and is really keeping me from making power. Based on the fact that I do not have a wiring harness, I'd have to custom wire the ECU's I have and hope I had the right combination of electronic parts behind it to make it work without ever having had a complete working engine to start with. Then, there's the fact that I'm already starting behind everyone else hardware wise because I use a low compression engine, not a later model high comp. Couple to that the less efficient old model blower and weaker block and the MR2 engine I got lucky finding in California 15 years ago and I have to sit back and ask myself why it is that I'm trying to push a clearly inferior product to its limits.
Having said that, there's a quick and easy solution. Now, late model 4agzes are conventionally available for around $1200 "complete". Now, sometimes these are removed by people who care in a pains-taking fashion. Sometimes they're removed by a guy who gets paid $5 and engine removal and gets to use a backhoe as his only removal tool. You get where I'm going, there's no guarantees. The ideal situation is that you, the end user get to remove it yourself. Then you can take the time and do it to the level you want it done. Cars with gze's in them are available on the market in "working" condition for about $2500 if you're thinking about trying this.
Several years ago a friend of mine who's a car importer got a great deal on a RHD ae92 Levin GTZ, which he drove for about a year before selling it to a friend who daily drove it. When the next winter hit, it was parked in a field...and never came back out. Two and a half years went by...and it came time to clean up the farm. The car was offered to me for $600 complete. Needless to say, I sprung for it.
The car came to my house needing only a clutch to be perfectly workable. It left on a flat deck, sent to the crusher. All of the body panels were stripped for resale (or turning into a table...jury's still out) including the side skirts, hood, fenders, doors, bumpers, headlights, taillights, signal lights and all wiring pigtails. Seats came out, as did the stereo, shift knob and steering wheel. This allowed easy removal of the ecu. The wiring harness was then peeled whole from the engine and the engine forcibly removed from the car. Compression tests before removal came in between 165-170psi/cylinder. This is a bit higher than expected, but not surprising given the car's 75k kilometre odometer reading.
Update: Spring 2011
Nothing really to document except that I've been researching upgrades for the 4agze. I have yet to touch the new block, instead looking to finish blowing up the old one. I've ordered a set of cams from GTSPartsman on DK...some 261/268 Colt cams with big lifts. I've also been hanging out a lot on Aussie message boards looking for power advice. Seems I need to find me a 3sgte throttle body because its apparently the only one that will fit the 4agze without serious driveability issues. These are not the easiest things to find in my area, so that should be fun to find. There may also be fitment issues. Next option after all that goodness is the heavyweight...sc14 upgrade. Doesn't seem as hard as I'd thought...you need to fab an upper mount for the blower and then it can be run using the stock systems. Apparently there are some issues with the inlet, outlet and bypass but the gyst is the same as putting the sc12 into the ae86...make new ones. Lastly, my intercooler cold pipe is too small. It makes no sense to have a 2.5" in and then a 2" out into the engine...should be the other way around if anything.
While doing all of that I'll have to try monkeying with the AFM to try and lean it out more and possibly upgrade the intake with larger piping as well as it is the same 2" size as the cold pipe. Might as well make it so the restriction is the throttle body.
Update: May 11th, 2011
Made some adjustments to the car...leaned it out a touch through the AFM, tightened the blower belt a bit because it was slipping. Car still ran like swiss...and then the blower got a bit louder. And a bit louder. And then, when I was as far away from home as was possible, the supercharger seized. It must have seized slowly during the drive because it started making all kinds of noise and just got louder and louder as we drove...followed by the sounds of things falling off the car.
We pulled over to find that the pulley on the blower was so hot it was glowing yellow and all the accessory belts were missing. Near as I can tell, the front bearings on the gze seized from heat, something that must have started long ago and just chose this night to finish what it had started. Either way, the blower stopped spinning, which burned through the blower belt...that took out the alternator and we were dead in the water. It got so hot the pulley actually melted off the blower...electronic guts sticking out and everything. It came home on a tow truck about two hours after the blower stopped...and was still too hot to touch.
I've decided that a post-op or autopsy needs to be done. God knows what has gone through the blower and its piping...even into the engine! Unfortunately, most of the system needs to come out to make that diagnosis...intake, blower, cooler and piping...most of which I had intended to upgraade anyway. So, looks like she's down for a while...probably a month or more...while I get all of this sorted out. If it looks good, I can always just change the blower (I have a spare) and then run on that for a while and upgrade the car in winter.
For now, its clearly a quick fix and then work on the other car.
Update: July 23rd, 2011
Well, I went into withdrawl and had to replace the blower. There doesn't seem to be any residual damage...nothing that's flown into the engine or anything. The car seems to run well, even starts better. I do note that the entire car needs to be tightened again. All of the driveline parts are slightly loose...driveshaft bolts, rear axle arm bolts etc all need a tweak. Rumour has it that camshafts are on the way, though they've been on the way for 6 months. I may be able to close out the season with some real power under my right foot. I've been surviving on warp speed...but starburst power is coming.
I noticed also that a surprising amount of fuel is still getting into the oil. I've changed it twice this year so far...once in April at season's start and earlier this week. Only 1500km between intervals. I have to find a way to lean the car out more under certain conditions. I noted yesterday that the car was turning 10:0 at idle when trolling down a hill out of gear...putting it in gear actually used less fuel. This makes no sense, but I've seen stranger things happen.
Still, the car turns 0.8 bar consistently...this is a tad below where its supposed to be, but i'll take it. I managed to get 310km out of 40L. In N/A guise when I first bought it she would have gone 400km on that...so its a little down, but given the power I'll take it. Speaking to that end, I've bought the car a tank of 91 and thrown in a Lucas Octane Boost for good measure. That'll bring it up to 94 octane. Next plan is to try adding some timing and see what happens. I've noted changes in performance from timing...even increases in boost from timing, which makes no sense. Either way, it'll make for some interesting tuning.
Update: May 13th, 2012
Finished off last year with a running car, loads of conjecture and attitude and a nearly endless supply of stupidity via the interweb.
Car worked well for the rest of the year. I never managed to get the throttle body working...the 3sgte body on the 4agze with my setup simply will not idle. The thrust it creates is impressive though, so I've left it on the car regardless which may sound counter-productive to some of you. I did try to get to the bottom of it on some forums...it makes no sense to me that it won't idle but its junior cousin 4agze tb will...but the people on the forums were of limited use. In typical internet fashion I was told that because I wasn't running my car "their way", it'd never work. No matter what forum I was on, nobody had a clue and hid behind their conclusion that I must not know what I'm doing because they didn't understand it. It was so bad on one forum I actually told them off. If you don't know, don't pretend to be an expert and understand that some of us aren't just mindless drones stalking and biting! We're going to do it our way, if you like it or not. Just answer the question and keep your opinion out of it.
I finally got cams in for the car. Finally! After several years of supplier dramas and distributor inability, I cornered myself some Colt Cams of the 261/268 combo variety. These cams have 8.3mm of lift and supposedly come with optimal timing "ground in". This means that the camshaft is slightly off OEM timing when installed, theoretically being ticked back a hair to perfect lobe seperation. We'll see about that.
I've heard a lot about these cams...rave reviews all over the internet etc. My biggest concern is that all of their dyno tests have been done on far less modified cars than mine. The other is they've all been done on "proper" cars with appropriate ECU's. It's hard to say what the gains on my setup will be...but the manufacturer claims a gain of 35whp on a bone-stock supercharged MR2. Considering that I run twice its boost pressure and have intake, exhaust and cylinder head mods and lack its silly OEM knock sensors and retards, results could be significantly higher. Compared to the large OEM n/a cams I was using, these cams are mountains. There is also the very real possibility that they will render the car undriveable, overly rich, overly lean, not start etc. I have noticed already that they increase valve lift enough that the valves in the head can actually hit each other during abnormal operation (me deliberately opening both exhaust and intake during lash setting, for example). So, if the timing belt breaks or skips, I do stand the very real chance of taking out the motor entirely. Keep in mind I use larger 3sgte valves...on a regular 4agze this may not be an issue.
The downside to all of this is I had to re-spec the entire head...which has to be the most monotinous thing anyone can ever do. Nothing I like more than spending an entire Sunday with a torque wrench, feelers and plastigauge. I discovered that it is actually possible to install these cams without doing this...you theoretically could just "drop" them in and run...my valves were close enough. However, not being an idiot, I chose to measure everything and do it right, doing it once. I was surprised to find that the Colt Cams specify intake only specs...they do not leave a larger gap on the ehaust side like OEM. I also noted that the gaps on the journal caps varied a bit, unlike OEM cams where they were the same all the way through. The cam journals were all within tolerance...just...but the clearances were inconsistent. This could also mean that my caps have worn funny over the years, which wouldn't surprise me either.
In re-spec'ing the head, I was fortunate to discover a real problem. The cam caps that was worn in a previous update is now a total loss despite my efforts to save it. The nicest thing I could say about it is that its bearing surface looks like the moon. Good thing it got caught...but I need to source another cap asap...there's no point in reinstalling this one.
Lastly, in a previous update I had mused about leaning out the fuel mix through AFM adjustment again. My AFM seems to run consistently but always a hair richer than I'd like. I had theorized that because it was so close to OEM in terms of its settings, I should just run a fresh, untampered meter and be done with it. When I went to do it over the off season, the car wouldn't even start. I tested the meters on a friend's car where they all (I have several) worked perfectly. So, I reinvestigated. The meters will start the car, you just have to force it to through throttle input...at which point it runs like its drunk. It runs rich and pulses/lurches as you drive. Not exactly what I was hoping for. Needless to say, it was swapped right back where it was and left alone. The interesting part was that once it was swapped back, the A/F ratio leaned by one whole point...now running in the mid 12's. This is a very good thing.